Understanding the Importance of Clean AC Coils
Air conditioners rely heavily on two main coils to function properly—the evaporator coil and the condenser coil. These components are responsible for heat exchange, which allows your system to cool indoor air efficiently. Over time, these coils can accumulate dust, debris, and even mold, reducing system performance, increasing energy bills, and impacting indoor air quality.
Regularly cleaning your AC coils not only ensures a more efficient cooling process but also extends the life of the unit. Clean coils mean less strain on your compressor, improved airflow, and a healthier living environment. Whether you’re maintaining a residential or commercial system, proper coil cleaning is a vital part of AC upkeep.
Recognizing When Your AC Coils Need Cleaning
If your air conditioner is running constantly without cooling efficiently, or if you notice unusually high energy bills, dirty coils might be the cause. Reduced airflow from vents, visible dirt on the unit, or freezing on the evaporator coil are also key indicators. Even if your system seems to be working, coil cleaning is recommended at least once a year—more frequently in dusty or humid environments.
Routine maintenance helps prevent coil corrosion and mold buildup, which could otherwise lead to costly repairs or health issues due to poor air quality.
Safety First: Preparing for Coil Cleaning
Before beginning any AC maintenance, safety must come first. Always turn off the power supply to your air conditioning system at the breaker box. This step is crucial to avoid electrical hazards or accidental activation during cleaning. Allow the unit to cool down completely, especially the condenser coil outside, Post Category , which can become very hot during operation.
Wear protective gloves and safety goggles when handling cleaning solutions or dealing with mold. If you have a known respiratory condition or are sensitive to dust or mildew, consider using a mask or hiring a professional for the job.
Accessing the Evaporator Coil
The evaporator coil is typically located inside the indoor unit, often behind a removable access panel near the air handler or furnace. Removing this panel may require a screwdriver and gentle handling to avoid damaging internal components.
Once the coil is exposed, assess its condition. If there’s only a light layer of dust, a gentle cleaning method may be enough. If you notice heavy grime or biological growth, deeper cleaning will be necessary. Be cautious not to bend or damage the delicate aluminum fins during inspection or cleaning.
Cleaning the Evaporator Coil
Start by using a soft brush or coil cleaning brush to gently loosen and remove surface dust and dirt. Avoid using metal brushes, as these can damage the fins. For deeper cleaning, you can use a no-rinse foaming coil cleaner, which is specially designed to expand into tight spaces and lift debris from the coil.
Spray the cleaner evenly across the surface of the coil and allow it to sit for the time specified by the product instructions. Most no-rinse cleaners will liquefy the grime, which will then drain away through the condensate line.
If necessary, rinse the coil gently using a spray bottle filled with clean water, but be careful not to flood the unit. Make sure the drain pan and condensate line are clear and draining properly after cleaning.
Accessing and Cleaning the Condenser Coil
The condenser coil is located in the outdoor unit. After disconnecting the power, remove the protective grill or outer panel to access the coil. This part of the system is exposed to outdoor elements and typically collects dirt, leaves, and other debris more quickly.
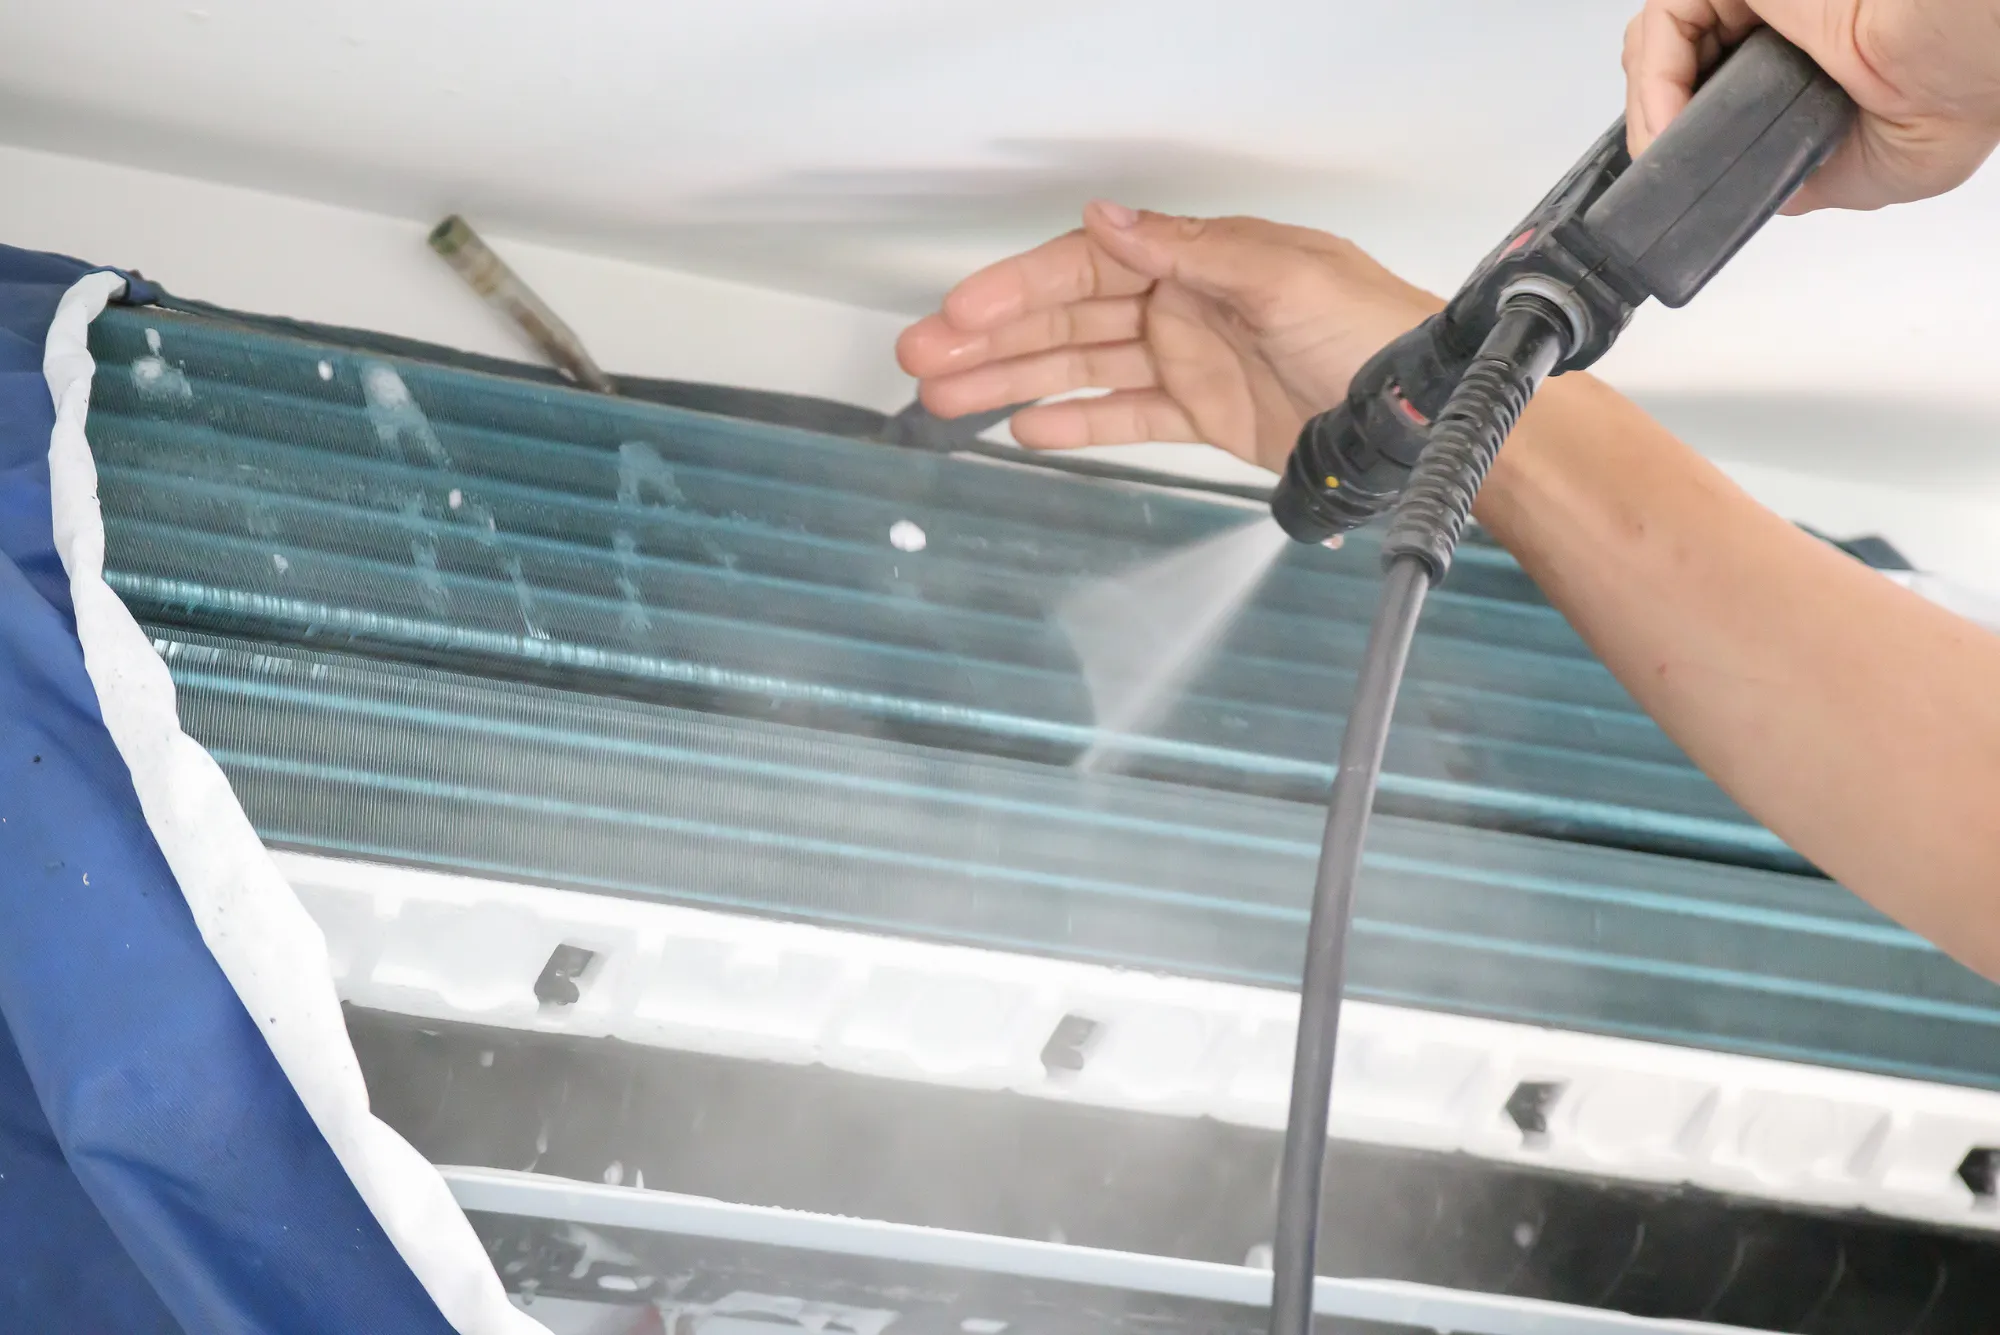
Begin by removing large debris manually using a gloved hand or a vacuum with a soft brush attachment. Avoid using pressure washers or high-pressure hose settings, as they can bend the fins or damage internal parts.
Spray a commercial condenser coil cleaner across the coil surface. These cleaners are formulated to cut through heavy grime and oil without damaging the metal. Let the solution sit for the recommended time and rinse gently with a garden hose, spraying from the inside out to push debris away from the coil.
Let the unit dry thoroughly before reassembling the panels and restoring power.
Straightening Bent Fins
Over time, fins on both evaporator and condenser coils may become bent due to physical contact or pressure washing. Bent fins can restrict airflow and reduce system efficiency. Using a fin comb—an inexpensive tool available at most hardware stores—you can carefully straighten bent fins and restore proper airflow.
Take your time during this process to avoid breaking or further damaging the fins. Always move in the direction of the fins and never force the comb through sections that are tightly compressed.
Cleaning the Surrounding Area
For the condenser unit outside, keeping the surrounding area clean is just as important as cleaning the coil itself. Clear away leaves, grass clippings, and weeds at least two feet around the unit. Ensure that there’s enough clearance above and around the condenser for optimal airflow.
This step reduces the risk of debris being pulled into the coil and prevents overheating or airflow restrictions that can damage your compressor over time.
Preventing Future Buildup
Once your coils are clean, it’s important to take steps to prevent rapid recontamination. Replace or clean your air filters every 1 to 3 months depending on usage and environment. A clogged air filter can allow dust to accumulate on the evaporator coil quickly.
Ensure your ductwork is sealed and leak-free to prevent dirt from being sucked into the system. Consider installing UV lights or antimicrobial treatments near your evaporator coil to reduce the buildup of mold and mildew in high-humidity climates.
Knowing When to Call a Professional
While DIY cleaning is safe and effective in many situations, some scenarios warrant professional service. If the coil is heavily impacted with grime, leaking refrigerant, or inaccessible due to system design, a certified HVAC technician should be called.
Professionals have access to specialized tools, industrial-strength cleaners, and the experience necessary to handle complex maintenance safely. Annual service contracts often include coil cleaning as part of seasonal tune-ups, which can help you avoid the hassle altogether.
The Impact of Clean Coils on Energy Efficiency
One of the most overlooked benefits of Clean AC Coils is energy efficiency. Dirty coils force the system to work harder, drawing more power to achieve the same cooling effect. This not only drives up electricity bills but also increases wear on the compressor and other key components.
Cleaning your coils regularly can improve energy efficiency by up to 30%, reduce your carbon footprint, and extend the overall lifespan of your air conditioning system.
In addition, clean coils enhance comfort. You’ll experience faster cooling, more consistent temperatures, and better humidity control—all of which contribute to a more pleasant indoor environment during hot weather.
Final Inspection and System Restart
After cleaning both coils, inspect all components for signs of wear, corrosion, or damage. Check the refrigerant lines for proper insulation and ensure that the fan motors are clean and spinning freely. Reinstall any panels or covers securely and restore power to the system.
Once powered on, monitor the unit’s performance. Listen for any unusual noises and check for proper airflow at the vents. Within 10 to 15 minutes, you should notice cool, clean air circulating through your home or workspace.
Cleaning your AC coils safely is a valuable maintenance task that pays off in comfort, energy savings, and system longevity. While the process requires careful handling and basic tools, it is manageable for most homeowners with a little patience and attention to detail.