Cleaning a stovetop often seems straightforward: wipe down the surface after cooking, scrub away spills, and polish it to a shine. Yet, one of the most overlooked areas is the space beneath the burners. Over time, crumbs, grease, and burnt residues build up in this hidden zone, creating unpleasant odors, smoke during cooking, and even fire hazards. Understanding how to properly clean under the burners of your stove not only extends the lifespan of your appliance but also makes your kitchen a healthier and more inviting place.
Why Cleaning Under Burners Matters
The area beneath stove burners is a natural trap for food particles, oils, and liquids that escape while cooking. When left unattended, these residues accumulate, harden, and in some cases even corrode the stovetop. This grime can cause uneven heating, foul smells, and even attract pests. A thorough cleaning ensures your stove functions efficiently while also maintaining food safety standards in your kitchen. Moreover, regular care prevents permanent staining that can diminish the overall appearance of your appliance.
Preparing Your Stove for Deep Cleaning
Before beginning, it’s crucial to prepare your stove safely. Always disconnect the power source for electric ranges and shut off the gas supply for gas stoves if you plan to do a deep clean. Allow the burners and stovetop to cool completely before removing parts. Gather soft cloths, non-abrasive scrubbers, mild dish soap, baking soda, white vinegar, and, for stubborn grease, a degreasing solution. Having everything ready ensures you can clean thoroughly without interruptions.
Removing the Burners Safely
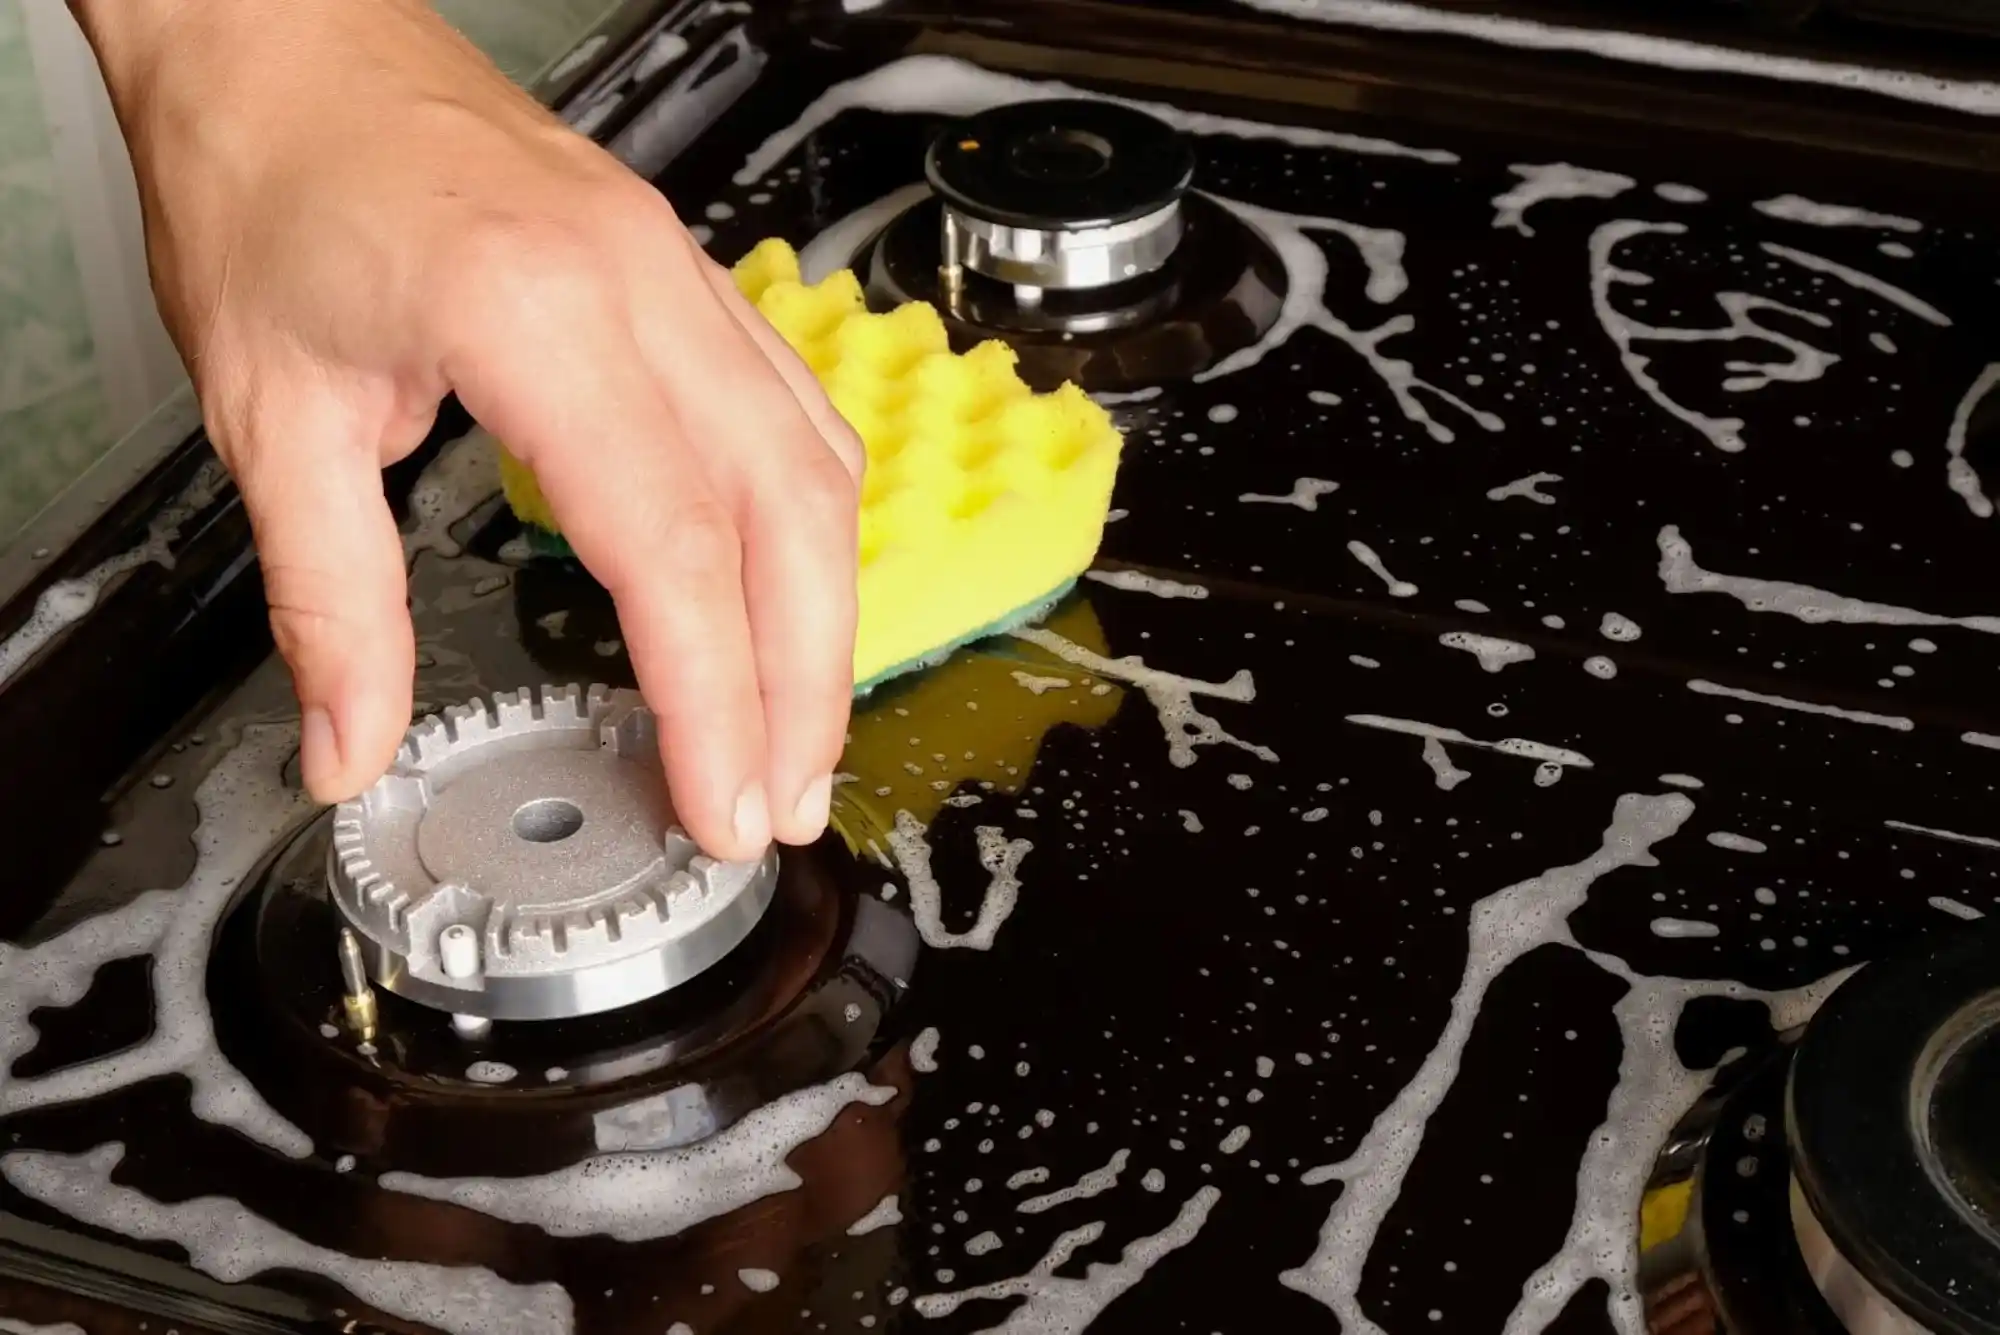
Most modern stoves have burners designed for easy removal. For electric coil burners, gently lift the coil upward and pull it out of the socket. For gas stoves, the burner grates and caps can be lifted away directly. If you feel resistance, consult your user manual rather than forcing any parts, as stoves differ in design. Place the removed components aside in warm soapy water to loosen surface grease while you focus on the stovetop itself.
Cleaning the Burner Pans and Drip Trays
Beneath most burners sit drip trays or pans, designed to catch spills. These trays often bear the brunt of cooking mess and can become stained over time. Start by soaking them in a mixture of hot water and dish soap for at least 20 minutes. Stubborn grime can be treated with a paste of baking soda and water, applied generously to the surface. After letting the paste sit, scrub gently with a soft sponge. Avoid metal brushes, which can scratch and dull the surface. Rinse thoroughly and allow them to dry completely before reassembly.
Tackling Grease and Food Build-Up Underneath
With the burners and drip trays removed, the stovetop surface underneath is exposed. This is where most hidden grime accumulates. Begin by wiping away loose crumbs with a dry cloth. For grease stains, spray a solution of equal parts white vinegar and warm water, allowing it to sit for a few minutes. Vinegar helps cut through oil while neutralizing odors. For hardened food spills, apply baking soda directly, then spray lightly with vinegar to create a fizzing reaction that loosens debris. After a short wait, wipe the area clean with a damp cloth.

Dealing with Stubborn Stains and Burnt Residues
Some stains resist ordinary cleaning methods, especially if spills have baked onto the surface. For these, apply a thick paste of baking soda and a few drops of dish soap. Spread it over the stain and let it sit for 15–20 minutes. Use a non-abrasive scrub pad to work the mixture into the residue gently. For enamel or stainless-steel surfaces, always scrub in the direction of the finish to maintain shine. If the stain persists, repeat the process rather than resorting to harsh chemicals that may damage the stovetop.
Cleaning Electric Burner Terminals and Gas Ports
For electric stoves, check the connection terminals of the burners for food debris or grease buildup. A damp cloth is usually sufficient to wipe them clean, but ensure they are fully dry before reattaching burners. For gas stoves, examine the burner ports, which allow flames to flow. Use a straightened paper clip or a soft brush to clear any clogged holes. Avoid using toothpicks or anything that may break inside the port. Keeping these components clean ensures even heating and prevents cooking disruptions.
Polishing the Stove Surface After Cleaning
Once the underlying areas are free of debris, it’s time to restore the surface shine. For stainless steel stoves, wipe down with a mixture of mild dish soap and water, then polish with a dry microfiber cloth. To add extra gleam, a few drops of mineral oil on a cloth can enhance the surface while providing a protective barrier against future smudges. For enamel-coated stoves, a damp cloth followed by a dry buffing cloth will bring out a smooth finish. Consistent polishing not only improves the appearance but also makes future cleaning easier.
Drying and Reassembling the Burners
Before putting everything back together, ensure all parts are completely dry. Moisture trapped in burner components can cause malfunction in electric stoves or disrupt the ignition process in gas stoves. Wipe down all pieces with a clean cloth and allow them to air dry if necessary. Once dry, carefully reinsert electric coils into their sockets or place burner caps and grates back onto gas stoves. Double-check alignment to ensure safe and efficient operation.
Maintaining a Regular Cleaning Schedule
Deep cleaning under burners doesn’t have to be a frequent chore if you adopt simple habits. Wiping spills immediately after cooking, soaking drip trays weekly, and performing a quick check under burners every month can significantly reduce buildup. By incorporating these routines, you avoid the need for heavy scrubbing and extend the lifespan of your appliance. A consistent schedule also makes your stove safer to use, reducing fire risks associated with grease accumulation.
Choosing Safe Cleaning Products
It is important to choose cleaning agents that are both effective and safe for your stove’s material. Harsh chemicals like bleach or ammonia can corrode finishes and create toxic fumes when exposed to heat. Opt for natural alternatives such as baking soda, vinegar, and mild dish soaps whenever possible. For commercial degreasers, always read the manufacturer’s instructions and ensure they are suitable for your stove type. Safety and effectiveness go hand-in-hand when selecting the right cleaning products.
Common Mistakes to Avoid When Cleaning
While cleaning under the burners is straightforward, there are common mistakes many homeowners make. Using abrasive steel wool pads can scratch surfaces permanently. Overusing water near electrical components can create hazards. Neglecting to dry parts completely before reassembling may cause malfunctions. Another frequent error is applying excessive force when removing burners, which can damage sockets or fittings. By understanding these pitfalls, you can clean efficiently without causing unintentional harm to your stove.
Benefits of Keeping Burners and Underneath Clean
Beyond aesthetics, maintaining a clean stove beneath the burners offers tangible benefits. Food cooks more evenly when burners function correctly without blockages. A grease-free environment minimizes the risk of smoke and unpleasant kitchen odors. Your appliance also lasts longer, reducing the likelihood of costly repairs or replacements. Most importantly, a clean stove promotes a safer kitchen environment, protecting your family from potential fire hazards caused by accumulated grease. The effort you invest in maintenance pays off in performance, hygiene, and peace of mind.
Final Thoughts on Stove Maintenance
Cleaning beneath stove burners might feel like a hidden, time-consuming chore, but it is an essential aspect of kitchen maintenance. By dedicating time to remove burners, soak trays, scrub hidden surfaces, and polish afterward, you create a healthier, safer cooking environment. The process doesn’t require expensive products or specialized tools—just consistency and care. Ultimately, your stove is the heart of your kitchen, and keeping it clean ensures it continues to serve you reliably for years to come.