A washing machine is one of the most essential appliances in any home, designed to make laundry tasks effortless. However, when your washer starts taking too long to fill or doesn’t fill at all, the issue often lies in the water inlet valve screens. These small mesh filters play a vital role in regulating water flow into your washer. Over time, they can become clogged with sediment, rust, or mineral deposits from your water supply. Learning how to test the washing machine inlet valve screens is crucial to maintaining your washer’s performance and extending its lifespan.
Understanding the Role of Inlet Valve Screens
Before testing, it’s important to understand what these inlet valve screens do. Each washing machine has one or more water inlet valves that control the flow of hot and cold water into the drum. Inside these valves are small mesh screens that act as filters, preventing dirt, debris, and sediment from entering the appliance. When these screens are clogged, water cannot flow freely, leading to reduced water pressure, incomplete cycles, or even complete failure to fill.
Although the screens are small, their role is significant. Without them, the internal parts of the washer could suffer from blockage, corrosion, or damage caused by contaminants in the water.
Signs of a Clogged or Faulty Inlet Valve Screen
Recognizing the early symptoms of inlet valve screen problems can save you from costly repairs. One common sign is when the washer takes longer than usual to fill with water. You may also notice that only one temperature (hot or cold) works properly, while the other barely flows. In some cases, the washer may fail to fill entirely, triggering an error message or halting the wash cycle.
Unusual noises such as humming or buzzing from the back of the machine can also indicate that water is struggling to pass through the valve. If your laundry appears less clean than usual or the water level seems low, these are further clues that your inlet valve screens might be clogged.
Preparing to Test the Inlet Valve Screens
Before starting the testing process, ensure that the washer is unplugged from the electrical outlet to avoid any electrical hazards. Also, turn off both the hot and cold water supply valves. Move the machine slightly away from the wall to create enough space for inspection. Have a towel or bucket ready to catch any residual water that may spill when disconnecting the hoses.
You’ll need a few basic tools such as pliers, a small brush, and possibly a multimeter if you plan to check the electrical integrity of the valve itself. Having everything ready before beginning ensures a smooth testing process without unnecessary interruptions.
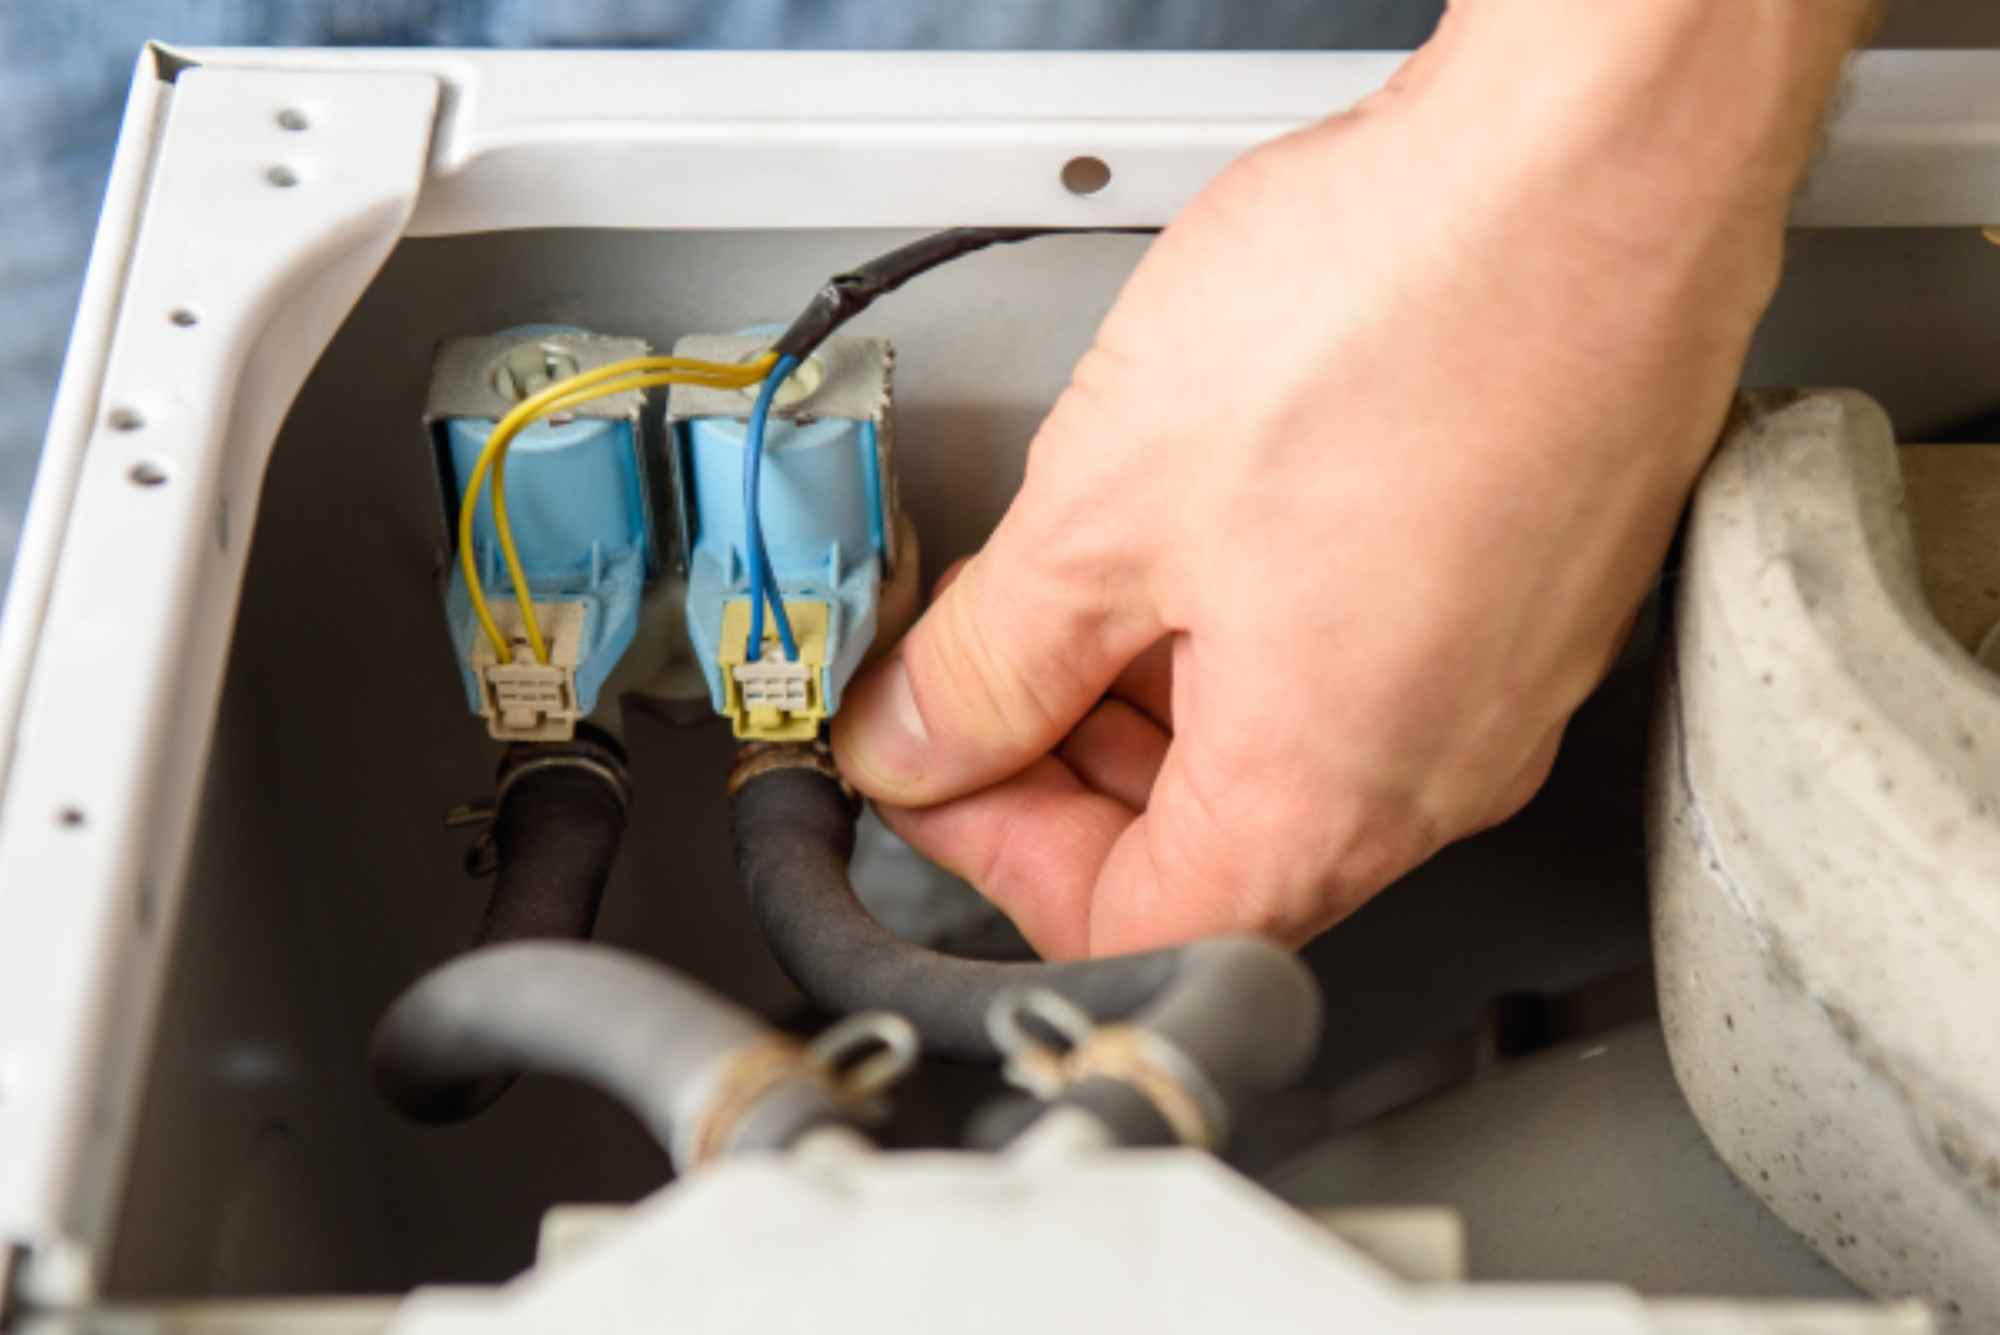
Accessing the Water Inlet Valve
The water inlet valve is typically located at the back of the washing machine repair where the hoses connect. To access it, start by disconnecting both hoses from the washer. Be careful, as a small amount of water might still be inside the lines. Once removed, you will see small metal or plastic mesh screens inside each inlet port. These are the valve screens that filter incoming water.
Gently inspect the screens under good lighting. If you notice discoloration, rust, or buildup of minerals, it’s likely that the screens are restricting the flow of water. However, to be certain, you’ll need to perform a test to confirm whether the screens are the cause of your washer’s issue.
Testing the Inlet Valve Screens
The first step in testing is to observe how freely water flows through the disconnected hoses. Hold each hose over a sink or bucket and briefly open the supply valves. If water flows strongly, the issue is likely with the screens or valve, not the plumbing.
Next, examine the screens closely. If they appear blocked, try rinsing them gently with water. You can also use a soft brush, like an old toothbrush, to remove any debris. Avoid using sharp objects or excessive force, as the mesh is delicate and can easily tear.
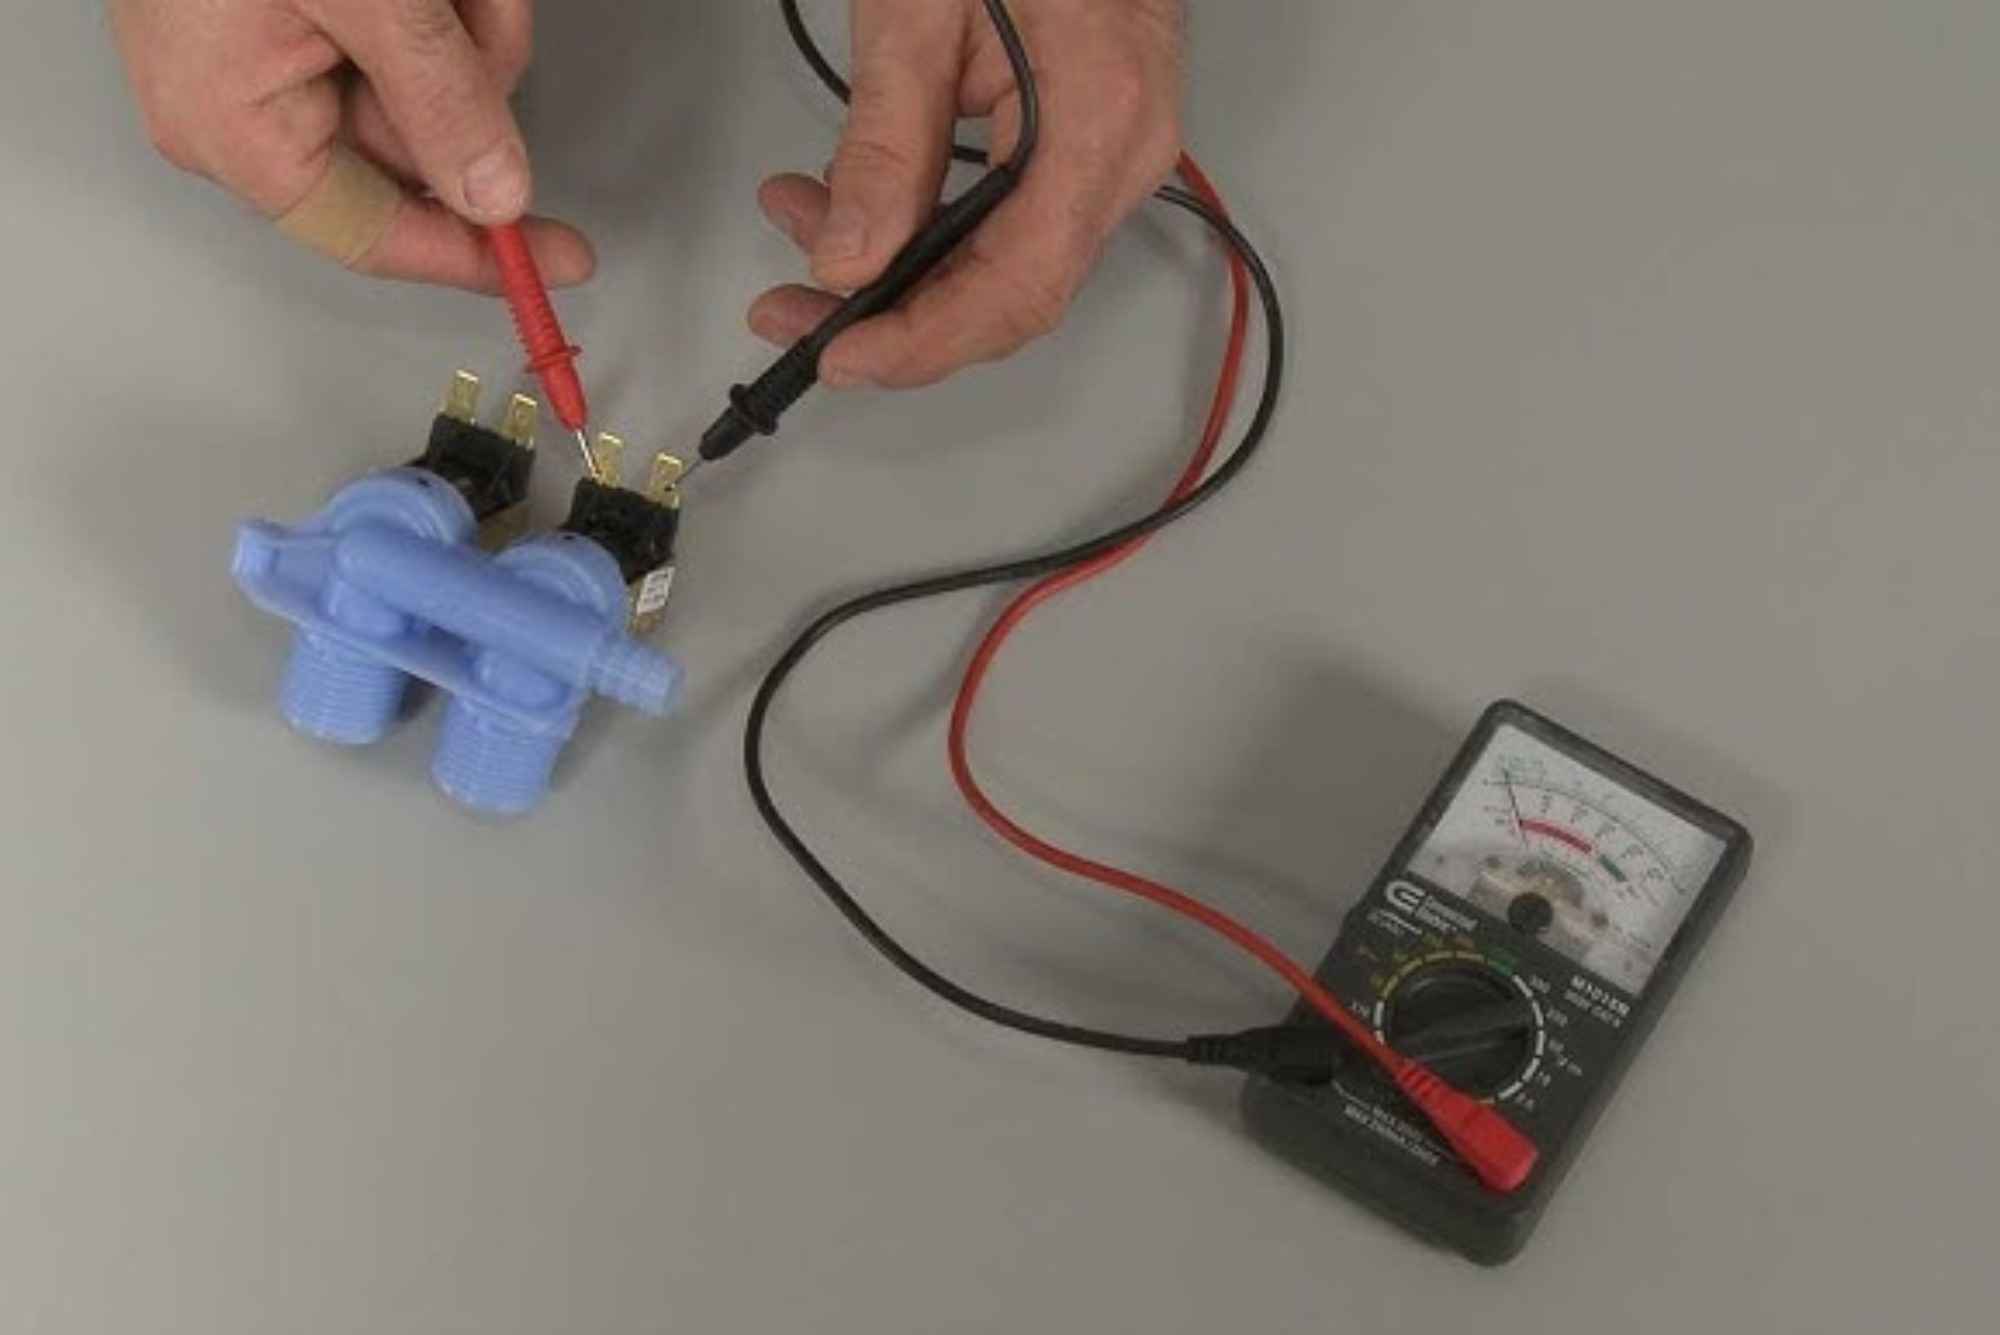
For a more thorough test, you can check the electrical function of the inlet valve using a multimeter. Set the multimeter to the resistance setting and place the probes on each of the solenoid terminals of the valve. A properly working valve usually shows a reading between 500 and 1500 ohms. If the reading is outside this range or shows no continuity, the valve may be faulty and require replacement.
Even if the electrical test passes, the screens can still be partially blocked, affecting performance. Therefore, always ensure both mechanical and electrical aspects are in good condition.
Cleaning the Inlet Valve Screens
If the screens are clogged, cleaning them is a simple yet delicate process. After removing them carefully with pliers, soak them in a solution of warm water and vinegar for about 30 minutes. This helps dissolve mineral buildup and rust. Gently brush off any remaining debris and rinse thoroughly. Once clean, reinstall the screens into their respective positions.
If the screens are torn or damaged, they should not be reused. Replacement screens are inexpensive and readily available at appliance parts stores or online. Using damaged screens can allow debris to enter the valve, leading to more serious issues later.
Reinstalling and Testing the Washer
After cleaning or replacing the inlet valve screens, reconnect the hoses securely. Ensure the hot and cold water hoses are attached to the correct ports. Turn on the water supply valves slowly and check for leaks. Plug the washer back in and run a short fill cycle. Observe the water flow—if it fills quickly and evenly, the issue has been resolved.
If the washer still struggles to fill or there is little improvement, the inlet valve itself may be malfunctioning. In such cases, replacing the entire valve assembly is often the most effective solution.
Preventive Maintenance Tips
Regular maintenance can prevent future clogs and ensure smooth operation. It’s a good idea to inspect the inlet valve screens every few months, especially if you live in an area with hard water or frequent sediment buildup in plumbing. Installing an external water filter or sediment trap on the washer’s supply line can also help protect the inlet screens.
Running the washer with balanced loads and keeping the hoses clean can minimize pressure fluctuations that stress the inlet valve. Avoid using excessive detergent, as residue can sometimes find its way into the water system and clog the screens over time.
When to Call a Professional
While testing and cleaning inlet valve screens can be handled by most homeowners, there are situations where professional help is advisable. If you notice persistent water flow problems even after cleaning the screens, or if electrical testing reveals an open circuit, it’s safer to contact an appliance technician. Professionals can diagnose more complex internal valve issues and ensure safe replacements without risking damage to your washer.
Importance of Regular Inspection
Many washing machine performance issues can be traced to neglected components like inlet valve screens. These screens might be small, but their maintenance is key to your washer’s long-term efficiency. A blocked screen doesn’t just slow water flow—it can also put unnecessary strain on other parts of the appliance, increasing wear and tear.
By regularly testing and maintaining these screens, you can avoid costly repairs, reduce water waste, and ensure that every wash cycle performs as intended. In homes where sediment or mineral content in the water is high, regular inspection becomes even more important.
Final Thoughts
Testing washing machine inlet valve screens is a simple yet crucial step in maintaining the efficiency and reliability of your appliance. By following a careful approach—inspecting, cleaning, and testing—you can restore proper water flow and prevent long-term damage. It’s not just about fixing an immediate issue but ensuring that your washing machine continues to operate smoothly for years to come.