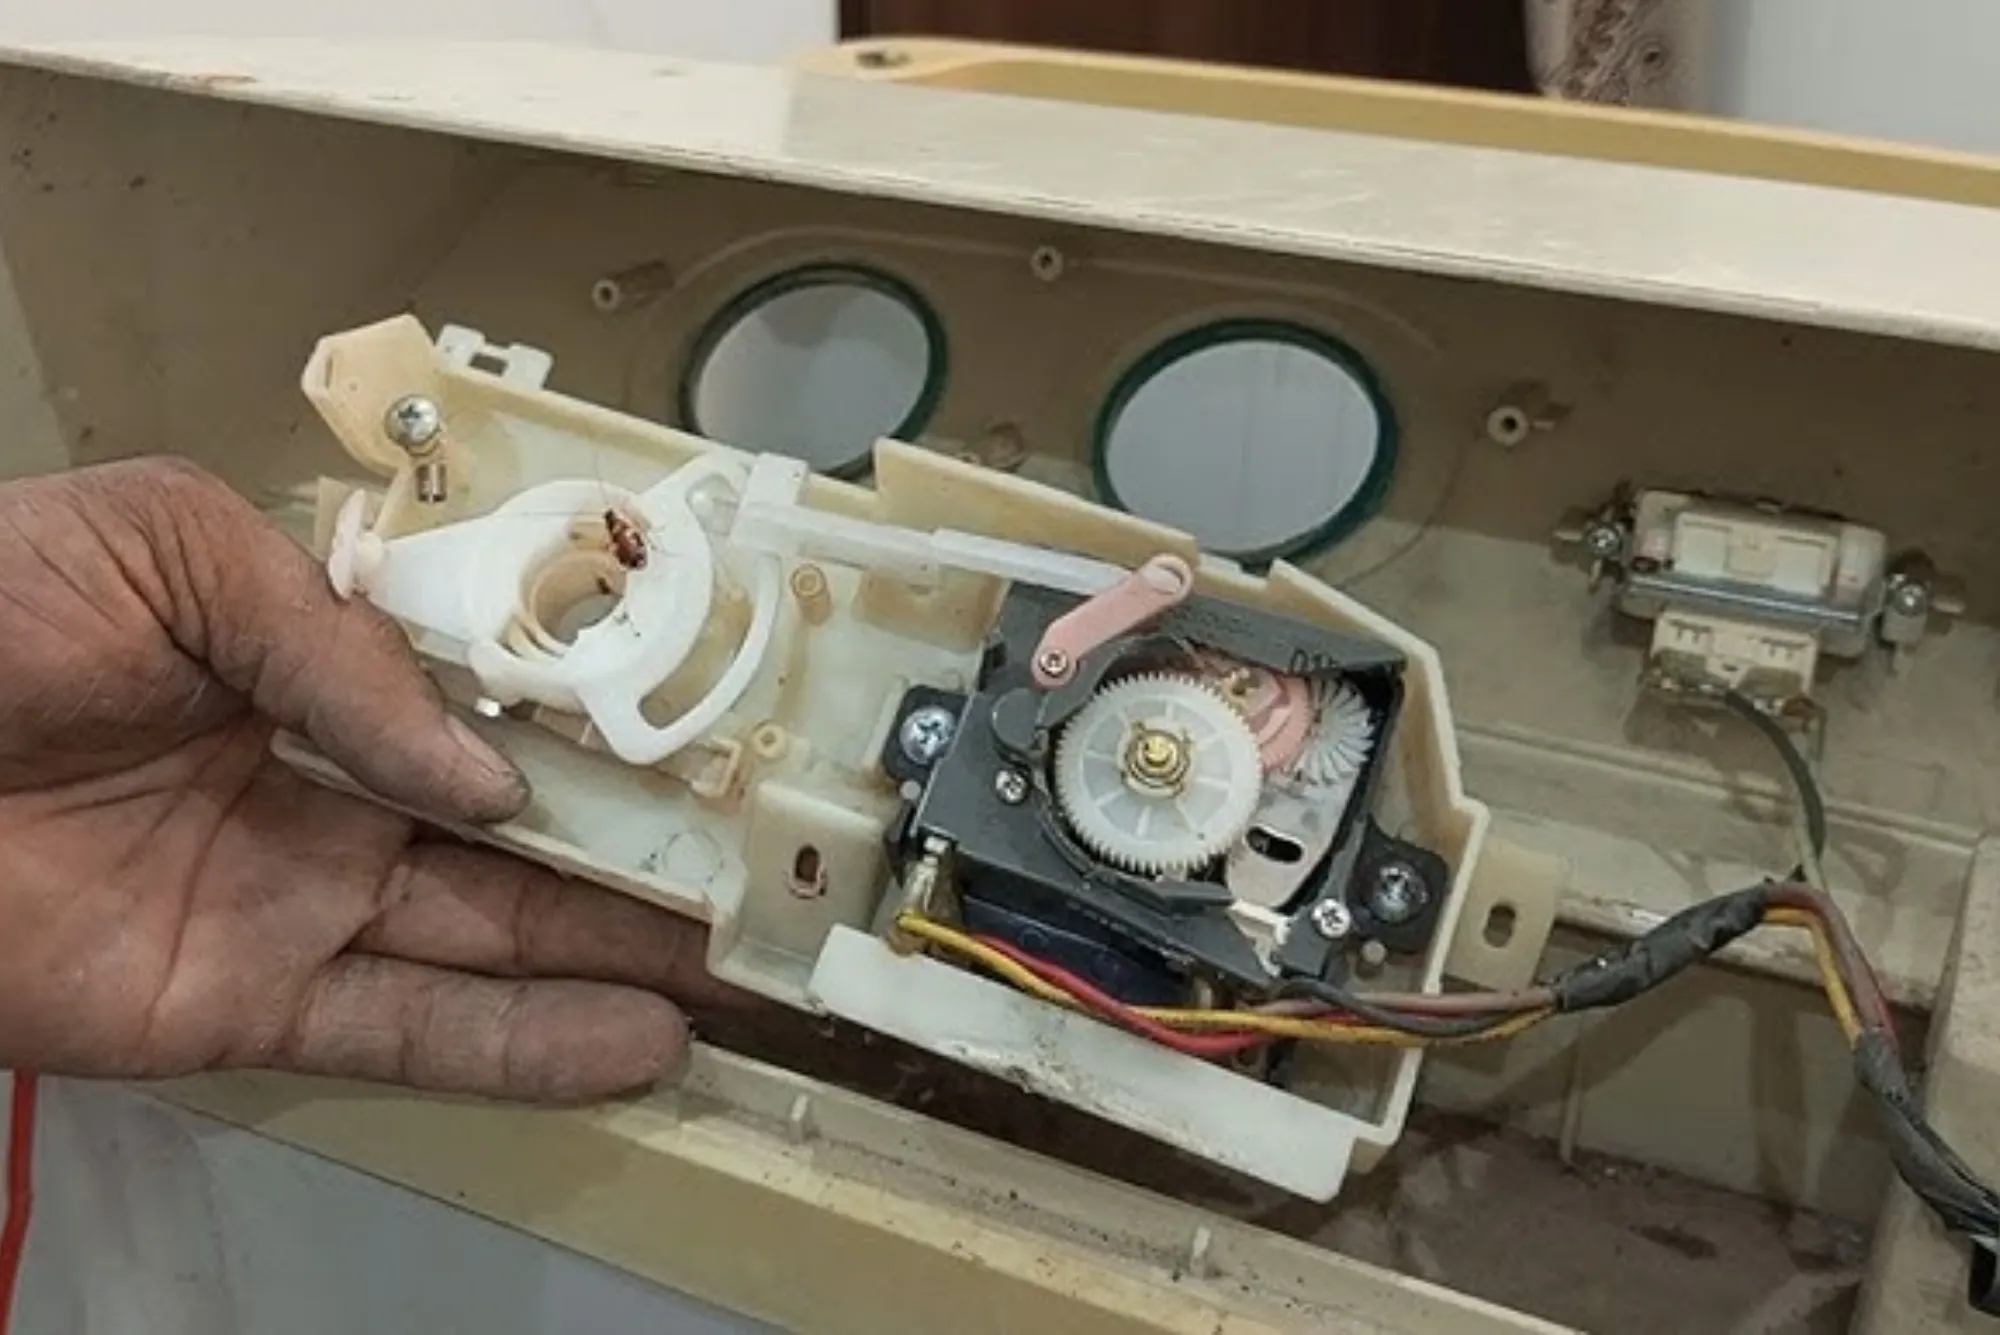
The timer motor in a washing machine is the heart of its operation cycle. It dictates when the machine fills, agitates, drains, and spins. Acting as a mechanical clock, the timer motor rotates internal contacts that control electricity flow to various components like the motor, pump, and solenoid valves. When this small motor fails, your washing machine may stall mid-cycle, skip functions, or stop working altogether. Understanding how to test this component ensures accurate diagnosis and avoids unnecessary replacement of working parts.
Before beginning any test, it’s essential to grasp how the timer motor functions. In most traditional top-loading and semi-automatic machines, the timer motor operates on alternating current (AC) and contains a small synchronous motor that rotates gears linked to internal switches. These switches sequentially connect circuits that control operations. A malfunctioning timer motor can prevent the machine from completing cycles or may cause erratic timing, making clothes improperly washed or the machine unresponsive.
Symptoms of a Faulty Timer Motor
A malfunctioning timer motor displays several noticeable symptoms. The most common sign is when the washing machine does not advance automatically through the cycles. For instance, after filling with water, the machine might stay idle without proceeding to the wash or spin function. Another common symptom is when the timer knob feels loose or does not move smoothly during operation. You may also notice the machine skipping steps or shutting down prematurely.
Occasionally, the washing machine may continue to operate endlessly without switching to the next function. This usually indicates that the timer contacts are stuck or that the timer motor has failed to rotate the internal mechanism. Unusual clicking sounds, a humming noise from the control panel, or a burnt smell can also point toward internal electrical faults in the timer motor. While these symptoms provide a clue, testing the timer motor electrically gives the most reliable confirmation.
Safety Precautions Before Testing
Before working on any electrical appliance, safety should always come first. Testing the timer motor involves handling live circuits and sensitive electrical components. Therefore, disconnect the washing machine from the power outlet completely. Avoid performing tests while the machine is connected, as it can lead to electric shock or damage to the control circuitry.
Once the machine is unplugged, ensure the work area is dry and well-lit. Use insulated tools to prevent accidental short circuits. Wear safety gloves and follow basic precautions such as discharging any stored electricity from capacitors by letting the machine rest for a few minutes after unplugging. If the washing machine has been recently used, wait for it to cool down to avoid burns from hot internal components.

Accessing the Timer Motor
The timer motor is usually located behind the main control panel or within the mechanical timer assembly. To access it, first remove the control knobs from the front of the panel. These knobs often pull straight off but may require gentle prying with a flat tool. Once removed, unscrew the panel screws and carefully lift the panel cover. Inside, you will see a compact motor connected to the timer assembly with two wires.
Some washing machine models may use a sealed timer unit, which makes accessing the motor slightly more challenging. In that case, it’s advisable to consult the service manual for guidance on disassembly. The timer motor typically has a small round or rectangular casing with two metal terminals. These are the points where electrical testing will take place.
Using a Multimeter to Test the Timer Motor
A multimeter is the most reliable instrument for testing a washing machine timer motor. Begin by setting the multimeter to the resistance (Ω) mode. The goal of this test is to check whether the motor winding inside the timer has continuity. Continuity means the electrical circuit is complete, allowing current to pass through. If the winding is broken or shorted, the motor cannot function.
To perform the test, connect the multimeter probes to the two terminals of the timer motor. A good timer motor usually shows a resistance reading between 2000 and 3000 ohms, though the exact value depends on the model. If the multimeter shows an infinite reading or “OL” (open line), it means the winding is broken, and the motor must be replaced. On the other hand, a zero or near-zero reading indicates a short circuit within the winding, also requiring replacement.
For more accuracy, gently move the timer shaft while testing. Sometimes, internal contacts that are slightly oxidized can create intermittent connections. If the resistance reading fluctuates erratically as you turn the shaft, it suggests wear or corrosion inside the timer motor.
Performing a Live Voltage Test
In some cases, a timer motor might show good resistance but still fail to operate under power. This can happen if the supply voltage is not reaching the motor terminals or if the internal mechanical gears are jammed. A live voltage test can help confirm this issue. However, this test must be done with extreme caution, as it involves live electrical connections.
Reconnect the washing machine to power and select a wash cycle while keeping the machine lid open. Using the multimeter set to AC voltage mode, carefully measure the voltage across the timer motor terminals. A reading close to your local mains voltage (110V or 220V depending on region) indicates that power is being supplied correctly. If voltage is present but the motor does not rotate, the motor is faulty. If no voltage is detected, the issue lies elsewhere in the wiring, timer switch, or control board.
After completing the voltage test, unplug the washing machine immediately to avoid any risk of shock. This test helps differentiate between an electrical supply issue and a motor failure.
Inspecting Mechanical and Wiring Conditions
Sometimes, the problem may not lie within the timer motor itself but in the associated wiring or mechanical assembly. Inspect the connector terminals for any signs of corrosion, discoloration, or loose connections. Damaged wires or burnt insulation can interrupt current flow, making the motor appear faulty even when it’s functional.
Additionally, check the timer shaft for smooth rotation. Dust, detergent residue, or mechanical wear can cause the gears to seize, stopping the motor from moving freely. A gentle application of electrical-grade lubricant can sometimes restore smooth motion, but if internal gears are damaged, the timer assembly needs replacement.
For older washing machines, it’s common to find the timer motor partially working—rotating intermittently or at inconsistent speeds. This behavior often arises from degraded internal lubricants or weakened gear springs, which cannot be repaired easily. Replacement remains the best option in such cases.
Replacing a Faulty Timer Motor
If your tests confirm that the timer motor is defective, replacement is straightforward. Purchase a compatible motor based on your washing machine’s brand and model number. Using an incompatible timer motor can cause incorrect operation or damage to the control system. Replacement motors are often sold as part of the timer assembly, though in some models, they can be detached separately.
To replace the motor, disconnect the wiring harness and unscrew the mounting screws holding it in place. Install the new motor in the same orientation, reconnect the wires securely, and reassemble the control panel. Once reconnected, run a full wash cycle to verify that the machine advances through all stages correctly. A properly functioning timer motor will ensure smooth operation without delays or abrupt stops.
Preventive Maintenance for Longer Timer Life
Although timer motors are durable, regular maintenance can prolong their life. Avoid overloading the washing machine, as excessive vibration and mechanical stress can affect the timer assembly. Ensure the machine’s control panel remains clean and dry, as moisture can cause electrical corrosion. Periodically rotating the timer knob gently, even when not in use, prevents the internal mechanism from sticking.
If your machine is stored in a humid area, use a protective cover and maintain proper ventilation to prevent rust. Avoid using chemical cleaners on the control panel that can seep into the timer assembly and damage contacts. Proper handling and routine checks every few months help detect minor issues early, saving on costly repairs later.
When to Seek Professional Help
While testing and replacing a washing machine timer motor is a manageable task for those comfortable with electrical repairs, not everyone has the necessary experience or tools. If your washing machine involves an electronic control board rather than a mechanical timer, professional servicing is advisable. Modern machines often integrate timer functions into microcontroller circuits that require advanced diagnostic tools.
If the machine continues to show irregular cycle behavior even after replacing the timer motor, the root cause might involve deeper issues such as wiring faults, relay failures, or sensor malfunctions. In such cases, a qualified technician can perform circuit-level diagnostics to identify and fix the problem safely.
Testing a washing machine timer motor is a practical skill that helps you diagnose one of the most common appliance failures. By combining careful observation with electrical testing using a multimeter, you can determine whether the issue lies in the timer motor, the wiring, or another component entirely. Understanding this process saves time, reduces repair costs, and prevents unnecessary replacement of working parts.