A stove is one of the most important appliances in any home, and its performance depends heavily on components we often overlook. Among the parts that rarely draw attention until something goes wrong are the surface element connectors. These connectors link the heating elements on your stovetop to the power source inside the appliance, ensuring that the elements heat evenly and efficiently. When they fail, cooking becomes unpredictable, frustrating, and potentially unsafe. Learning how to replace stove surface element connectors is a valuable skill that can save money, extend the life of your appliance, and restore confidence in your daily cooking routine.
Understanding the Role of Surface Element Connectors
To appreciate the importance of replacing a damaged connector, it helps to understand what it does. Each electric stove surface element receives power through a connection at its base, typically a plug-in style that fits into a socket wired to the stove. These connectors carry electrical current from the control switch to the heating coil. Over time, the high temperatures generated during cooking, combined with normal wear, can cause the connectors to degrade. Metal prongs may corrode or loosen, and the plastic housing can become brittle or discolored.
When this happens, the connection becomes unreliable. You might notice a burner that heats intermittently, takes too long to reach the right temperature, or fails entirely. In some cases, the problem appears to be the coil itself, but often the culprit is the connector hidden beneath the surface. Addressing this issue promptly not only ensures consistent cooking performance but also reduces fire risks and prevents further damage to the appliance.
Recognizing the Signs of Connector Failure
Identifying a failing connector before it stops working completely is beneficial. The symptoms usually appear gradually. A burner may glow inconsistently, cycling between red-hot and lukewarm without changes at the control knob. Another common sign is visible scorching around the element base. In severe cases, you might detect the smell of melting plastic or burnt wiring.
Ignoring these early indicators can lead to more serious issues. A failing connector creates resistance in the circuit, which generates additional heat. This extra heat damages nearby wiring and may even cause the stove to trip breakers or blow fuses. For households that depend heavily on their stove, these disruptions can be particularly inconvenient. By recognizing the warning signs, homeowners can act early, securing replacement connectors before complete failure occurs.
Safety Preparations Before Beginning Replacement
Working with electrical components always requires caution. Replacing a surface element connector may seem straightforward, but it involves direct contact with wiring that carries significant current when energized. The very first step before beginning any repair is to disconnect the appliance from its power source. For most stoves, this means unplugging the unit from the wall outlet. In some cases, particularly with hardwired models, you may need to switch off the appropriate circuit breaker.
After ensuring the stove is completely disconnected from power, take time to gather the right tools. Wire cutters, pliers, and screwdrivers are essential, along with high-temperature wire connectors designed for appliances. Using proper replacement parts is critical, since ordinary connectors cannot withstand the heat generated during cooking. Once tools and parts are ready, position the stove so that you can work comfortably without straining. Adequate lighting is also important to ensure you can see the wiring clearly.
Taking these precautions reduces risks and helps prevent mistakes during the repair process. Even if the task seems routine, a moment of oversight when working with electricity can result in injury or damage. Patience and preparation are just as important as mechanical skill.
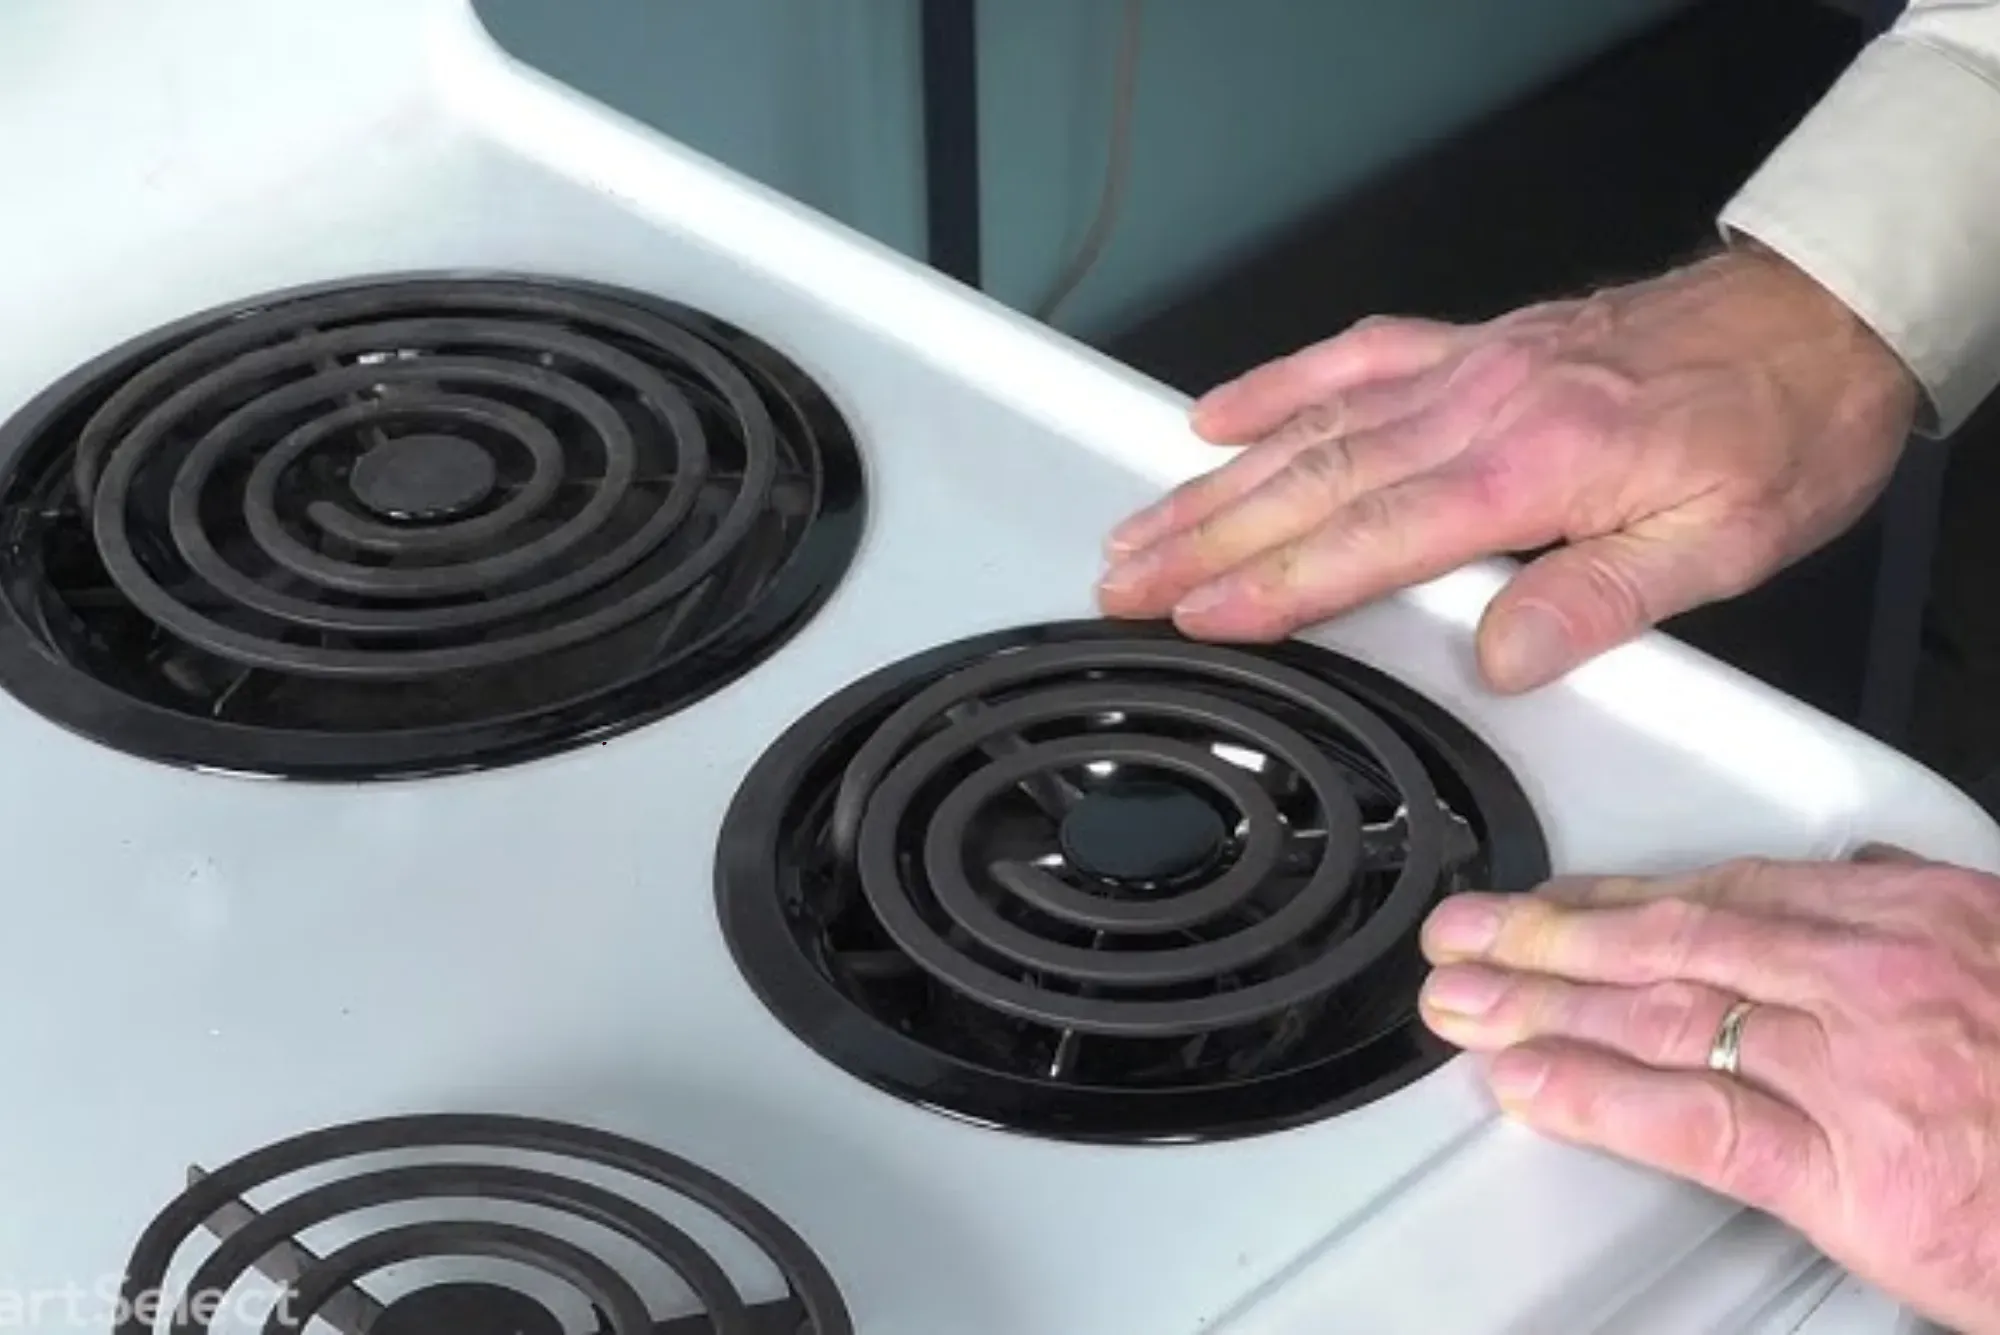
Accessing the Damaged Connector
Most stoves allow relatively easy access to the surface element connectors, though the exact design varies by manufacturer. On many models, the heating element lifts out from the stovetop, exposing the terminal block where the connector sits. Once removed, you can visually inspect the socket and wiring.
If the connector shows obvious damage, such as burnt marks, melted plastic, or loose terminals, replacement is necessary. Sometimes, the wires leading into the connector may also show signs of overheating, with insulation that has become brittle or darkened. In such cases, the repair will involve not only replacing the connector but also trimming back damaged wiring until fresh copper is available.
Being gentle during this stage is important. Tugging too hard on wires or forcing components can worsen the problem. Documenting the setup with a quick photo before disconnecting anything can also be helpful, serving as a reference during reassembly.
Removing the Old Connector
With the stove safely disconnected and the element removed, the next step is detaching the old connector. Typically, this involves using pliers to pull the metal terminals free from the heating element prongs. Care should be taken to avoid bending or twisting the element terminals, since they must remain intact to ensure a solid connection with the new part.
After detaching the connector, examine the wires leading into it. If they are clean and undamaged, they can be reused. If not, use a wire cutter to trim away the affected portion and strip back a small section of insulation to expose fresh copper. It is essential to create a solid electrical path without corrosion or weakened strands. This ensures the replacement will last and function reliably.
Installing the New Connector
The replacement connector should match the design and specifications of the original part. High-temperature ceramic or heavy-duty plastic connectors are standard in most modern stoves, capable of withstanding the demanding environment beneath the cooktop. Installation begins by attaching the prepared wires to the terminals of the new connector.
Using the correct crimping tool or heat-resistant wire nuts is critical. A poor connection at this stage could create the same problems as the old part, leading to premature failure. Once the wires are securely fastened, the connector is reattached to the element prongs. You should feel a snug, secure fit that does not wobble or loosen easily.
Testing the Repair Safely
Once the connector is replaced and the element reinstalled, it is time to test the repair. Before doing so, ensure all tools are cleared from the work area and the stove surface is free from debris. Restore power by plugging the stove back in or switching on the breaker.
Turn the replaced burner to a medium setting and observe. A properly installed connector will allow the element to heat quickly and evenly. There should be no flickering, sparking, or unusual odors. Allow the burner to remain on for several minutes to confirm stability. If everything appears normal, the repair can be considered successful.
If problems persist, double-check the wiring for loose connections. In some cases, the element itself may also be faulty, and replacing both the element and the connector is the final solution. Either way, careful testing ensures safety before returning the stove to regular use.
The Importance of Using Quality Replacement Parts
When working with appliances that handle both high heat and high current, not all replacement parts are equal. Using generic connectors not rated for stove use can lead to dangerous failures. Only connectors specifically designed for stove elements should be considered, ideally sourced from the appliance manufacturer or reputable suppliers of appliance parts.
These parts are engineered to tolerate repeated cycles of heating and cooling without breaking down. Investing a little more in quality ensures a longer-lasting repair and peace of mind. Choosing the right part also avoids compatibility issues that might prevent the connector from fitting securely.
Knowing When to Call a Professional
While many homeowners can handle this repair themselves with patience and care, some situations are best left to professionals. If the wiring inside the stove is severely damaged, or if you are not comfortable working with electrical components, seeking professional repair services is the safest choice. Technicians have the expertise and equipment to diagnose deeper problems, such as faulty switches or wiring harnesses, that might mimic connector issues.
Calling in help may cost more than a do-it-yourself repair, but it ensures safety and guarantees the job is done correctly. Weighing the risks and benefits honestly is part of responsible appliance maintenance.
Replacing stove surface element connectors may seem like a small task, but its impact on both safety and convenience is significant. A failing connector can interrupt your daily cooking, damage surrounding components, and even pose fire hazards if ignored. By recognizing the signs of failure, preparing carefully, and installing the correct replacement parts, you can restore your stove to full working order.
This process not only saves the cost of a service call but also empowers homeowners to maintain one of the most relied-upon appliances in the kitchen. With proper tools, caution, and attention to detail, replacing surface element connectors becomes a manageable project that extends the life of your stove and ensures reliable performance for years to come.