If your air conditioner has suddenly stopped cooling, one of the most common culprits is a faulty contactor. The contactor is a small but vital part in your AC’s outdoor unit—it’s basically the switch that controls power to your compressor and condenser fan motor. When it wears out, your AC may hum but fail to start, or it might run inconsistently. Knowing how to replace an AC contactor yourself can save you both time and money, especially during the hot summer months when every minute without cool air feels unbearable.
I’ve replaced quite a few contactors over the years, both for my own home and for clients, and while it’s not the most complex job in HVAC repair, it does require caution, the right tools, and a bit of confidence around electrical components. Let’s walk through the process in a practical, hands-on way.
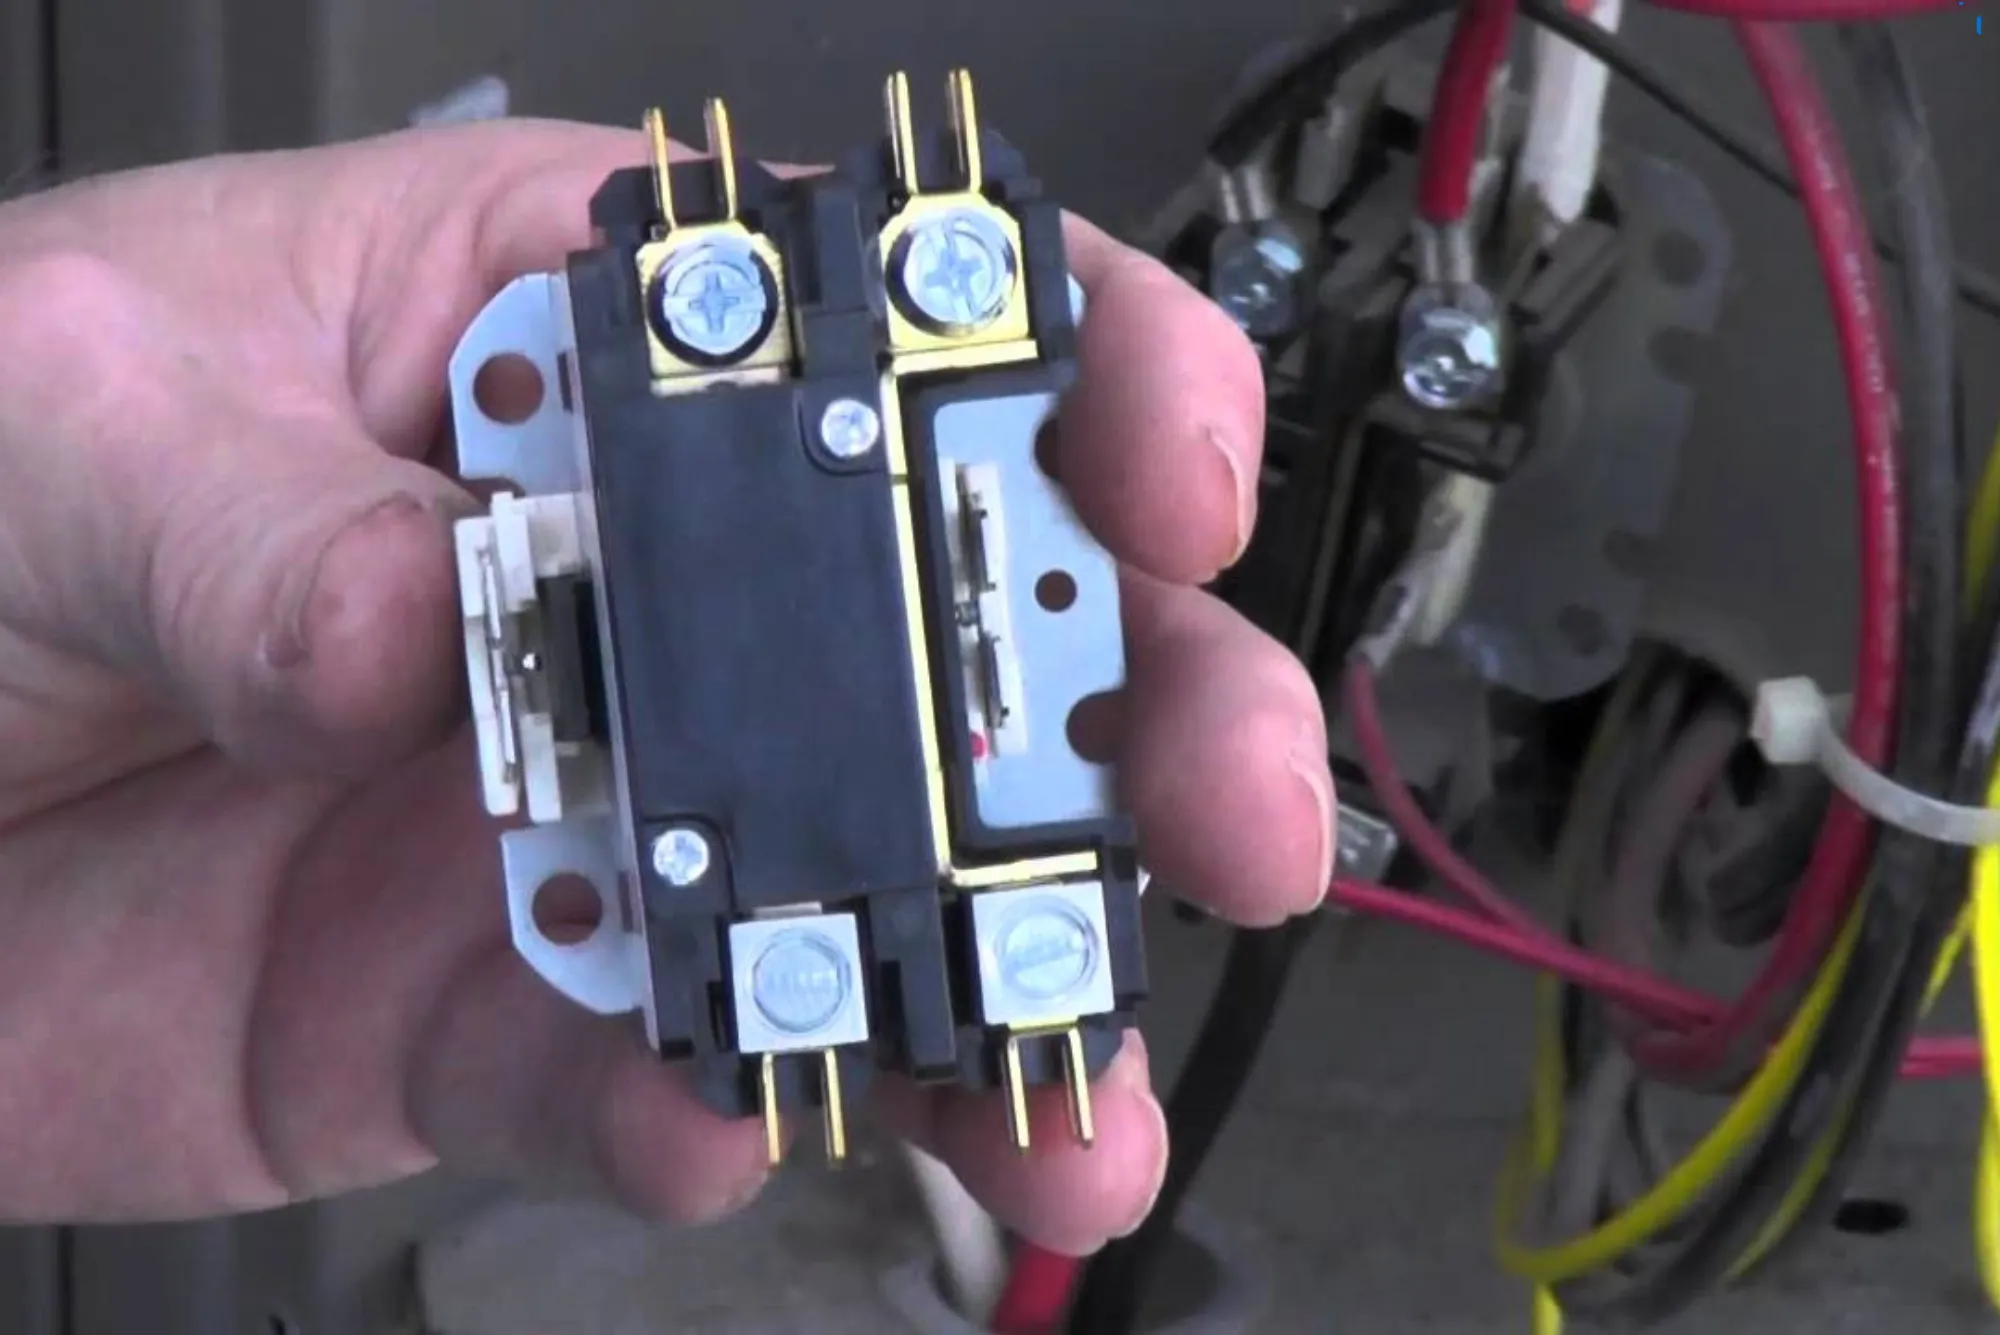
Understanding What an AC Contactor Does
Before you dive into replacement, it’s important to understand what you’re dealing with. An AC contactor is essentially an electrically controlled switch. It receives a signal from your thermostat, which energizes an electromagnet inside the contactor. That magnet pulls down a set of contacts, allowing electrical current to pass from your home’s power supply to the AC’s compressor and fan motor.
When the contactor fails—usually due to wear on the contact points or a burnt coil—the AC can’t operate as intended. Sometimes, you might hear a clicking sound but nothing happens. Other times, the AC will keep running even after the thermostat tells it to shut off, which can cause damage to other components.
Signs You Might Need to Replace the Contactor
From my experience, there are a few telltale signs that a contactor has gone bad. If your AC won’t turn on at all, runs intermittently, or the outdoor fan isn’t spinning, the contactor could be the issue. Another giveaway is visible damage—if you open your outdoor AC panel and see blackened, pitted contacts or melted plastic around the component, it’s time for a replacement.
Sometimes, you can test the contactor with a multimeter to confirm whether power is flowing correctly. If you’re getting inconsistent readings or no continuity when the thermostat calls for cooling, that’s a strong indication the contactor is defective.
Safety First
One thing I always stress when explaining how to replace an AC contactor is safety. The contactor operates at high voltage—often 240 volts—which can cause serious injury or worse if mishandled. Before you do anything, shut off power to your AC unit at the breaker panel. Then, double-check by using a non-contact voltage tester on the incoming wires to ensure there’s absolutely no electricity flowing.
It’s also smart to wear insulated gloves and safety glasses during the process. Even after shutting off the breaker, capacitors inside the unit can hold a residual charge. While the contactor swap doesn’t require you to mess directly with the capacitor, Post Category, it’s better to stay aware of its presence.
Choosing the Right Replacement Part
AC contactors come in different configurations—single pole, double pole, varying amperages, and coil voltages. Before you order a new one, check your existing contactor for model numbers and specifications. Most residential units use a 24V coil with 30 or 40 amps, but it’s best to match your exact part to avoid compatibility issues.
If the label on your contactor is worn or unreadable, you can reference your AC unit’s model number and look up the correct replacement in the manufacturer’s documentation or through an HVAC parts supplier. Personally, I always recommend sticking with reputable brands rather than the cheapest generic option—you’ll get more reliability and longevity.
Step-by-Step: How to Replace an AC Contactor
Once you’ve got your replacement part, it’s time to get hands-on.
- Shut off power completely – As mentioned earlier, kill the breaker to your AC system and verify with a voltage tester that no current is present.
- Access the outdoor unit’s control panel – Remove the screws holding the service panel in place. You’ll usually find the contactor mounted near the middle of the unit with several wires connected to it.
- Document the wiring setup – Before disconnecting anything, take clear photos of the wiring from multiple angles. Trust me, even if you’re confident, those photos can be a lifesaver when reconnecting everything later.
- Disconnect the wires – Use a screwdriver or nut driver to loosen the terminals. Some wires may be push-on connectors, which you can remove with needle-nose pliers.
- Remove the old contactor – It’s typically held in place with two to four screws. Remove them, and carefully lift the contactor out.
- Install the new contactor – Position it exactly where the old one was and secure it with screws.
- Reconnect the wires – Refer to your photos and connect each wire to its corresponding terminal. Make sure the connections are snug but not overtightened.
- Close up the panel and restore power – Replace the service cover, tighten the screws, and turn the breaker back on.
Testing Your Work
Once power is restored, set your thermostat to cooling mode and lower the temperature setting so that the AC kicks on. You should hear the contactor click as it engages. The outdoor fan and compressor should start running smoothly without hesitation.
If the AC doesn’t start, double-check your wiring against the photos you took. Sometimes a loose connection or swapped wire can prevent operation. If everything looks correct and the AC still isn’t running, the issue might be elsewhere in the system, and it’s wise to call a professional HVAC technician.
Maintenance Tips to Extend Contactor Life
Replacing a contactor is straightforward, but ideally, you don’t want to be doing it every year. A few preventive measures can help extend its lifespan.
Keep your outdoor unit clean and free from debris—dust, leaves, and insects can contribute to contactor wear. During seasonal maintenance, inspect the contactor for early signs of pitting or corrosion. If you notice heavy oxidation, you can sometimes clean the contacts with a fine file, though this is more of a temporary fix than a permanent solution.
Also, be aware that frequent short-cycling of your AC—when it turns on and off rapidly—puts extra strain on the contactor. If this is happening, it’s worth investigating the root cause, such as thermostat issues, refrigerant problems, or an oversized unit.
When to Call a Professional
While this guide on how to replace an AC contactor is meant to empower you to handle the task yourself, there are situations where calling an HVAC pro is the safer move. If you’re uncomfortable working around high-voltage components, unsure about electrical safety, or if the AC has multiple problems beyond just the contactor, professional service is the better choice.
Experienced technicians can also spot other potential issues during the replacement process, such as worn capacitors, frayed wiring, or failing compressor components, which could save you from a breakdown later in the season.
Final Thoughts
Learning how to replace an AC contactor is a valuable skill for any homeowner comfortable with basic electrical work. It’s one of the more approachable HVAC repairs and can be completed in under an hour with minimal tools. By understanding how the contactor functions, recognizing signs of failure, and following safe replacement practices, you can keep your AC running smoothly through the hottest days of the year.
That being said, never underestimate the importance of safety and accuracy when dealing with electrical systems. With the right preparation, the correct part, and a methodical approach, replacing an AC contactor can be a satisfying and cost-effective DIY project.