Replacing a stove element receptacle may sound intimidating, but it is one of the most common and straightforward appliance repairs a homeowner can undertake. The receptacle is the part that holds the stove’s heating element in place and provides the electrical connection necessary to generate heat for cooking. When it wears out, you may notice the burner failing to heat properly, sparking, or not working at all. Understanding how to replace this small but crucial component will save money on service calls and extend the life of your stove.
Understanding the Role of a Stove Element Receptacle
Every electric stove is designed with heating elements that connect directly to the appliance’s electrical system. These connections are made through receptacles, sometimes referred to as sockets, which hold the elements securely. A stove element receptacle must maintain both a strong physical grip and an uninterrupted electrical connection. Over time, heat cycles, movement, and corrosion can weaken this connection. When that happens, the stove struggles to deliver consistent heat, leaving you with undercooked meals or an unreliable cooking surface.
Recognizing the Signs of a Failing Receptacle
Before beginning any repair, it is essential to confirm that the receptacle is indeed the source of the problem. A worn or failing receptacle often causes one of several telltale signs. The heating element may only work intermittently, cutting off and on as you cook. You may notice burn marks or discoloration around the socket area. In severe cases, the element may not heat at all despite being firmly seated. Another warning sign is visible charring on the receptacle’s wiring, which can indicate overheating. These indicators should never be ignored, since damaged electrical parts increase the risk of fire.
Safety Preparations Before Attempting the Repair
Because you will be working with electrical connections, safety is the highest priority when replacing a stove element receptacle. Begin by disconnecting power to the stove. For plug-in models, this means unplugging the unit from the wall outlet. For hardwired stoves, you must switch off the corresponding circuit breaker at the main electrical panel. Confirm that no power is reaching the stove before proceeding by turning a burner knob and checking that the element does not heat.
It is equally important to work in a well-lit, stable environment. Have a heat-resistant work surface nearby to place removed elements and tools. Always wear insulated gloves to protect your hands from sharp edges or accidental electrical contact. Proper preparation ensures that the repair will be both efficient and safe.
Gathering the Necessary Tools and Parts
To complete this repair, you will need a few basic tools. A screwdriver, usually Phillips head, is required for removing any screws securing the receptacle assembly. Wire strippers and crimping tools may also be necessary if the replacement kit includes new wiring leads. Electrical tape or heat-resistant wire connectors help secure the final connections.
Equally important is acquiring the correct replacement receptacle. Stove element receptacles vary slightly in design depending on the manufacturer, so it is wise to check your appliance model number before purchasing the part. Many replacement kits come with universal fittings, but confirming compatibility prevents frustration during installation.
Removing the Heating Element
The first physical step in the process is to remove the defective heating element. Gently lift the element up and pull it straight out of the receptacle. Most standard stove elements are designed to plug into the socket without additional fasteners, though some may include a retaining clip. Be cautious when removing the element to avoid bending the prongs. Once removed, set the element aside in a safe place where it will not be damaged.
With the element removed, you will have direct access to the receptacle. This is the point at which you can inspect it closely for damage such as charring, cracks, or corrosion. A worn receptacle will often appear discolored or loose compared to a new part.
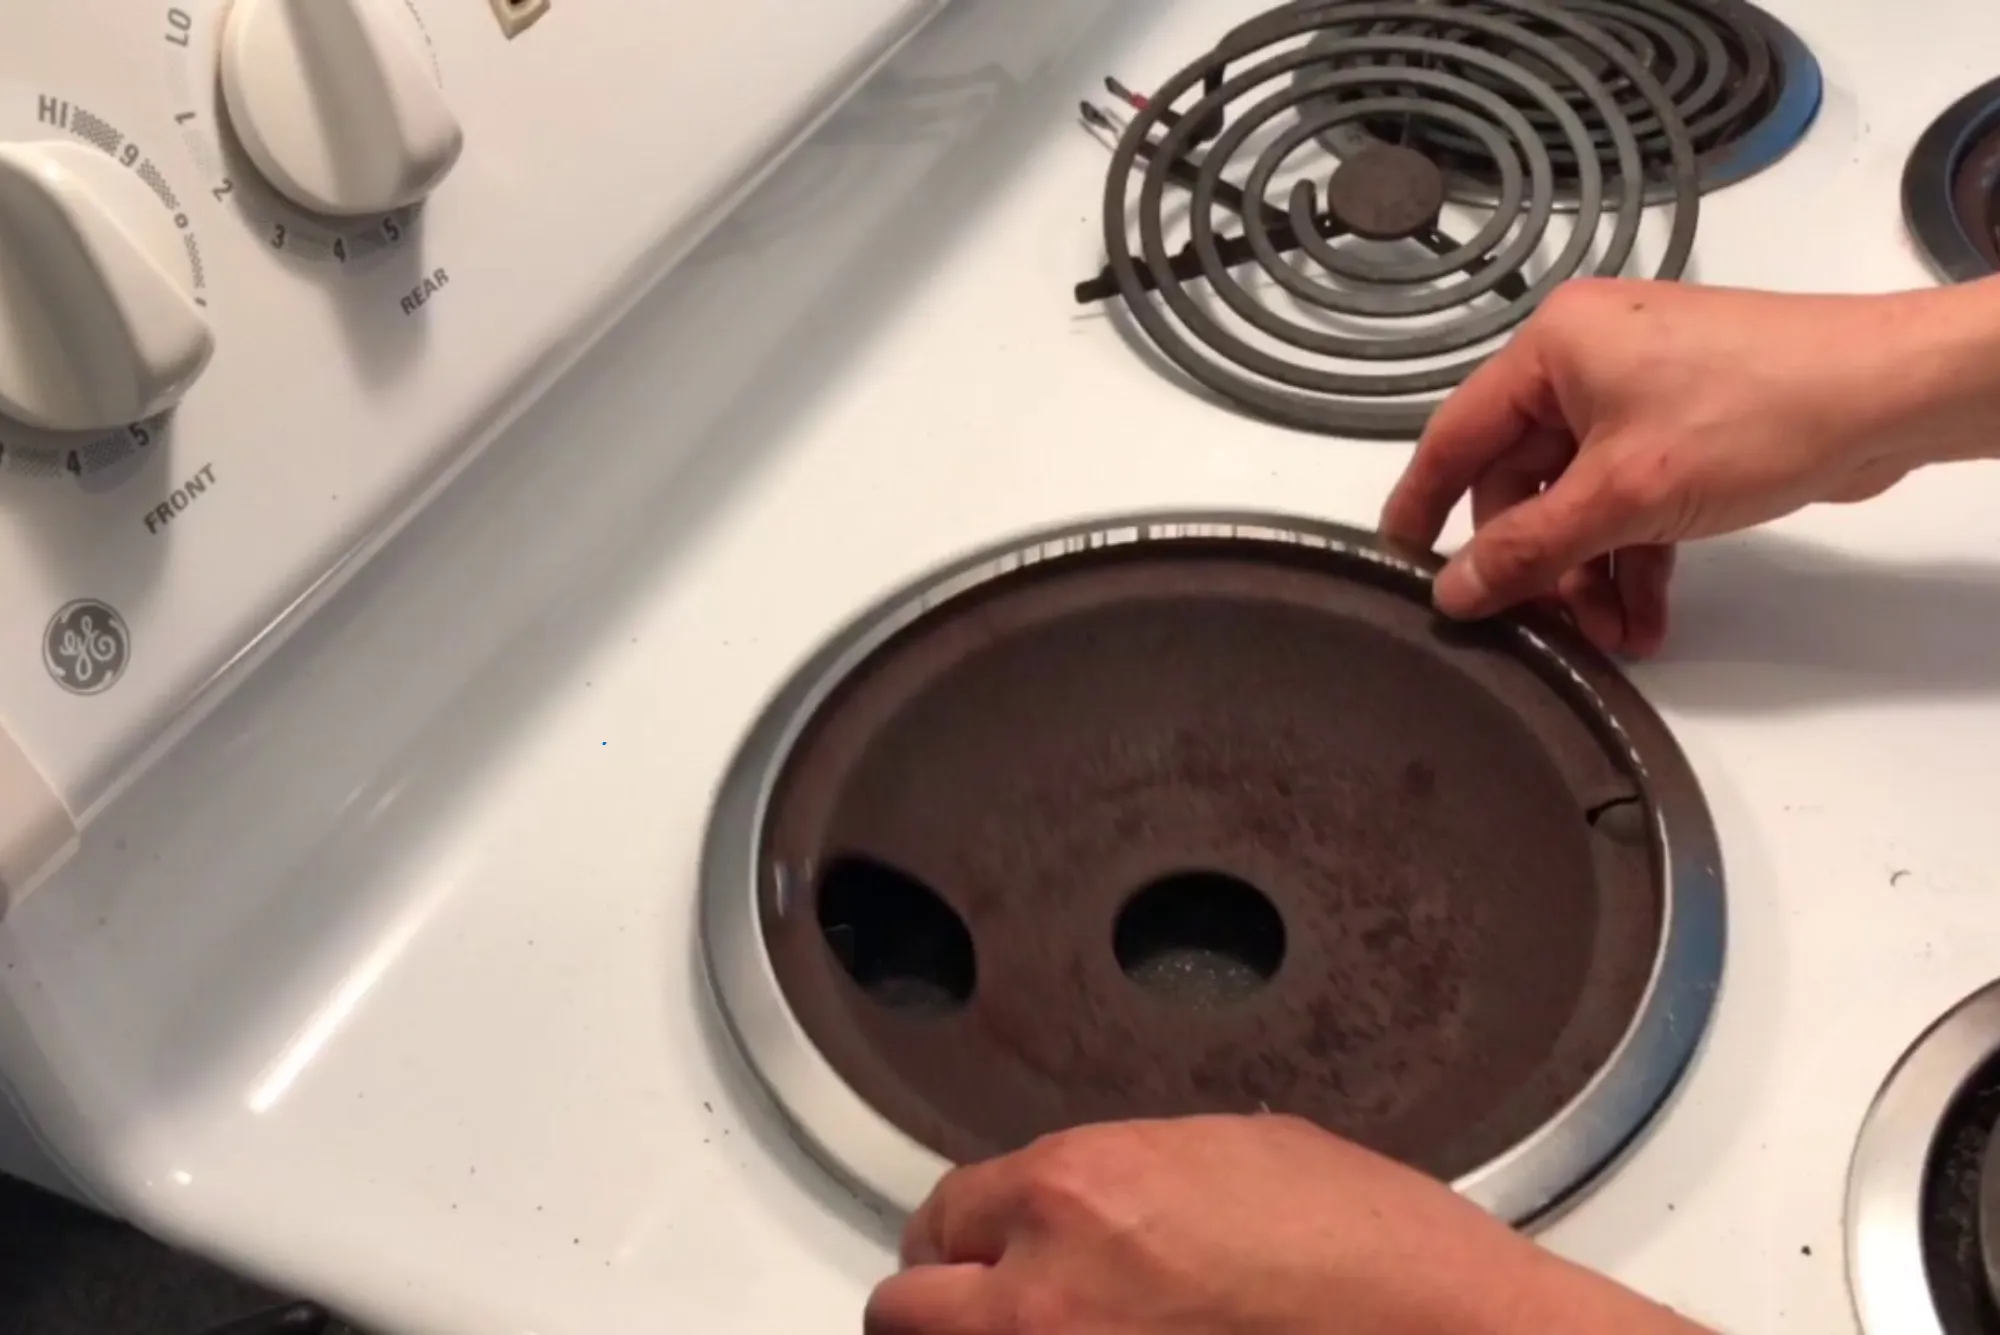
Accessing and Removing the Old Receptacle
To remove the receptacle, first check if it is secured with mounting screws or a bracket. Use your screwdriver to carefully loosen and remove these fasteners. Once the receptacle is free, gently pull it out far enough to expose the attached wiring.
Most receptacles are connected by two insulated wires, each leading back to the stove’s internal wiring harness. Before disconnecting them, take a photo or make a note of which wire attaches to which terminal. Maintaining this orientation ensures that the new receptacle is installed correctly. Use your screwdriver or a pair of pliers to loosen and disconnect the wires from the old socket.
Preparing the Wires for a New Connection
In some cases, the wires leading to the receptacle may show signs of overheating or damage. If the insulation is brittle or burned, it may be necessary to trim back the wire to expose fresh copper. Use a wire stripper to remove a small section of insulation from the ends of the wires. Be sure not to nick or weaken the copper strands, as this could reduce conductivity and compromise the repair.
If your replacement kit includes new leads with pre-crimped connectors, you may need to attach these to the stove’s wiring using wire nuts or heat-resistant crimp connectors. Whichever method is used, ensure that the connection is secure, tight, and properly insulated. Loose or exposed wiring increases the risk of electrical failure.
Installing the New Receptacle
Once the wiring is prepared, attach the wires to the terminals on the new receptacle. Match the orientation you recorded earlier, ensuring that each wire is connected to the correct side. Tighten the terminal screws securely to prevent the wires from loosening during use. After attaching the wires, carefully tuck them back into the stove body to avoid pinching or crimping.
Secure the new receptacle in place using the screws or bracket removed earlier. Confirm that it is firmly mounted and aligned properly to receive the heating element. The socket should not wobble or shift when touched.
Reattaching the Heating Element
With the new receptacle installed, the heating element can be reinserted. Align the prongs of the element with the new socket and push them straight in until the element is fully seated. You should feel some resistance, but it should not require excessive force. If the element does not fit, double-check that the receptacle is the correct replacement part for your stove model.
Once the element is properly reinstalled, it should sit level with the surface of the stove. A misaligned element can indicate that the receptacle was not mounted correctly or that the element’s prongs were bent during removal.
Testing the New Installation
Before restoring full use to your stove, it is essential to test the new installation. Reconnect power by plugging the stove back in or switching on the circuit breaker. Turn on the burner connected to the replaced receptacle and watch carefully as the element begins to heat.
The element should glow evenly without flickering or cutting out. Listen for any unusual noises such as buzzing or sparking. If everything operates smoothly, the repair is complete. Turn off the burner and allow the element to cool fully before considering the job finished.
Troubleshooting After Replacement
In rare cases, the stove may continue to show problems even after replacing the receptacle. If the element still does not heat, the issue may lie with the element itself rather than the socket. Elements can burn out internally and fail to generate heat. Replacing the element with a known working one can confirm this diagnosis.
Another possible cause is a fault in the stove’s infinite switch, the component that regulates power to the element. If both the element and receptacle are in good condition but the burner still fails, the infinite switch may require professional testing and replacement.
Long-Term Maintenance and Prevention
A newly replaced receptacle should last for many years if properly cared for. To extend its lifespan, avoid rough handling when removing or reinstalling heating elements. Always ensure elements are seated firmly to prevent arcing, which generates heat damage over time. Periodically check for signs of discoloration or looseness during routine cleaning.
Maintaining a stove is ultimately about paying attention to small issues before they escalate. A receptacle replacement is a straightforward repair, but ignoring the early signs of failure could result in larger and more costly electrical problems.
Final Thoughts on Stove Element Receptacle Replacement
Knowing how to replace stove element receptacles empowers homeowners to handle one of the most common stove repairs with confidence. This repair requires only basic tools, a careful approach, and a commitment to safety. By recognizing the symptoms of a failing receptacle, following proper safety steps, and installing the replacement correctly, you can restore your stove’s performance quickly and reliably.
A functional receptacle is more than just a connection point—it is the key to consistent heat and safe cooking. Investing the time to learn and perform this repair ensures that your stove remains dependable for years to come.